Showing posts with label Campaigns. Show all posts

Monday, 19 August 2013

The Rescue of Thrár

Scenario 3 - The Rescue of Thrár

In the aftermath of the assault on the Second Hall, Balin's scouting parties come under attack. Balin must mount a daring rescue...

Forces

Good
Balin
Dwarf Captain
8 Khazad Guard
2 Dwarf Warriors with shields

Evil
Goblin Captain
6 Moria Goblins with shields
6 Moria Goblins with spears
6 Moria Goblins with bows
Goblin Drum

Deployment

Thrár and the two Dwarf Warriors begin the game in hiding; the Good player takes three pieces of paper and writes Thrár's name on one of them. He then passes the folded pieces of paper to the Evil player, who places each piece next to some rubble or another suitable terrain feature further than 6" away from each other. This way, neither player knows exactly where Thrár is hiding, but each has a rough idea. Paul placed the pieces of paper at locations 1, 2 and 3 on the map.

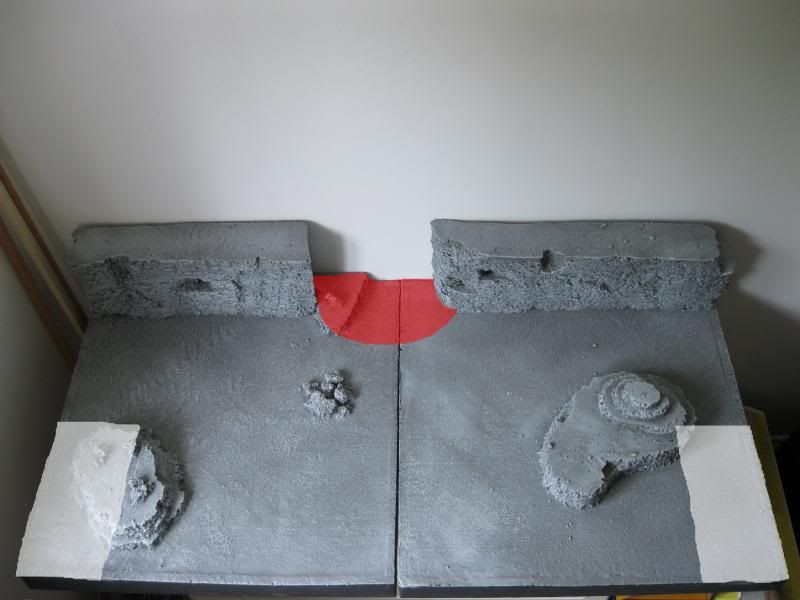
Once the papers are placed, the Evil player deploys his force within the Goblin deployment area (as shown on the map, in red). Finally, the Good player deploys Balin and the Khazad Guard within their deployment area (as shown on the map, in white).

The Dwarf deployment zone in white, the Goblin deployment zone in red
and the three possible locations of Thrár's hiding place
Special Rules

Thrár
The hidden Dwarves are not deployed at the start of the game. When a model from either force comes within 6" of a piece of paper is is turned over. If Thrár's name is on the paper then the Good player may place Thrár and the two Dwarves with shields within 1" of the piece of paper. If the paper is blank, simply remove it from the game - Thrár is elsewhere.

Victory

The Good side wins if it manages to kill all of the Evil force or drive them form the field. If Balin or Thrár is slain, the Evil side wins. If both sides meet their victory conditions in the same turn, the game is a draw. 

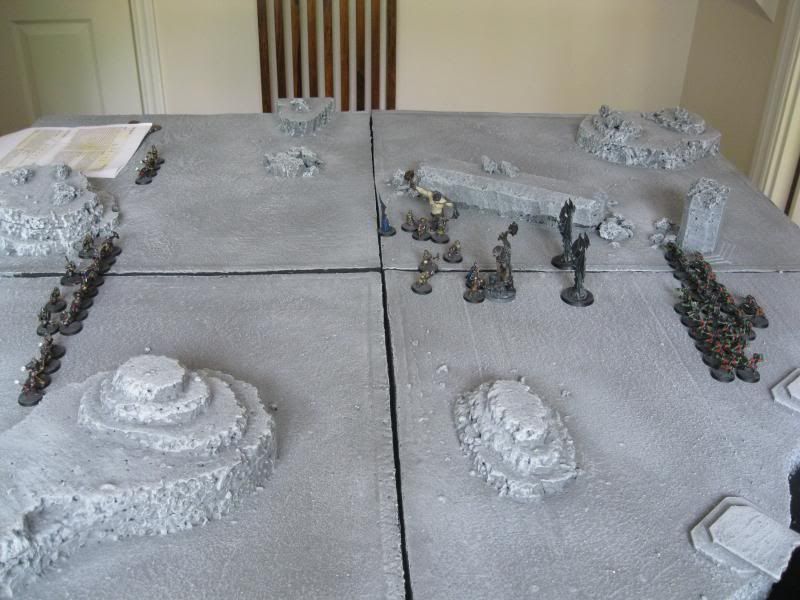
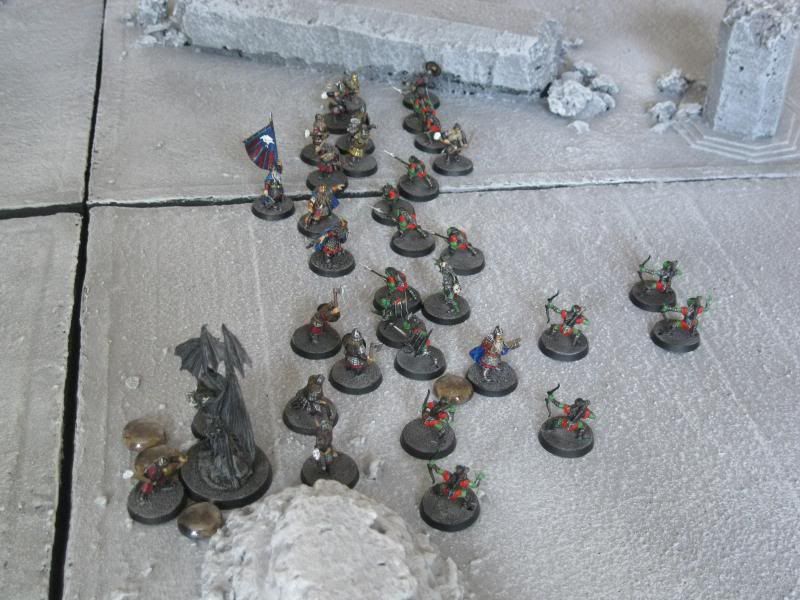
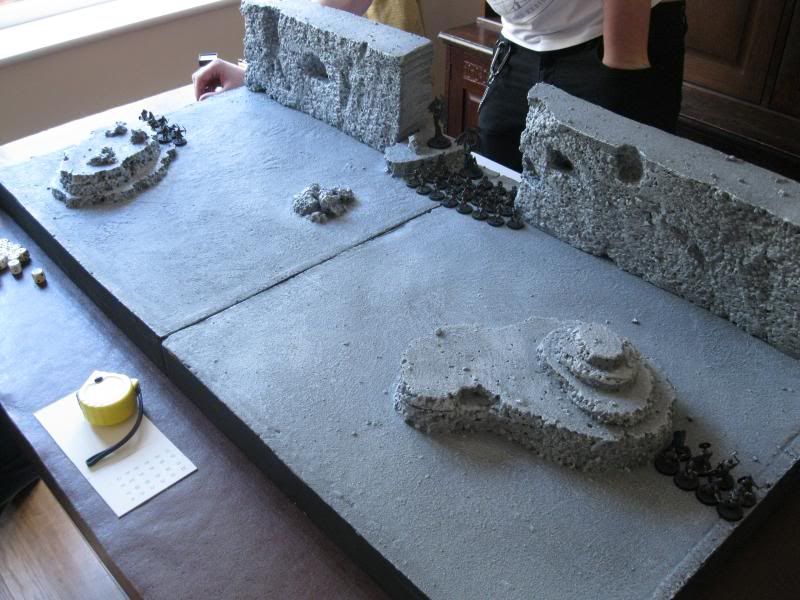
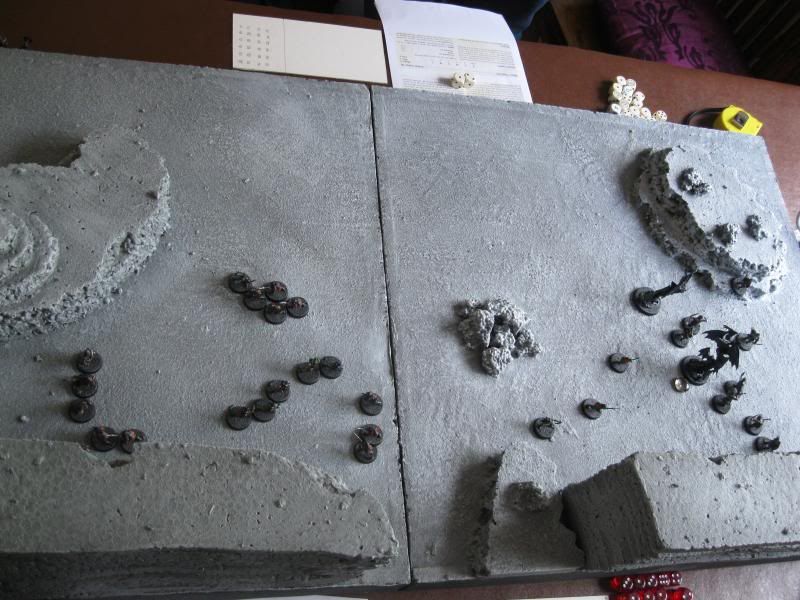
Paul's deployed his forces with the bow-armed Goblins positioned on the hill to pepper the Dwarf advance and the remainder of his forces in the centre ready to make a dash for the nearest piece of paper. Gary stuck all his Dwarves far out on the right flank, which was the only real option if he wanted to avoid getting swamped early.

Deployment
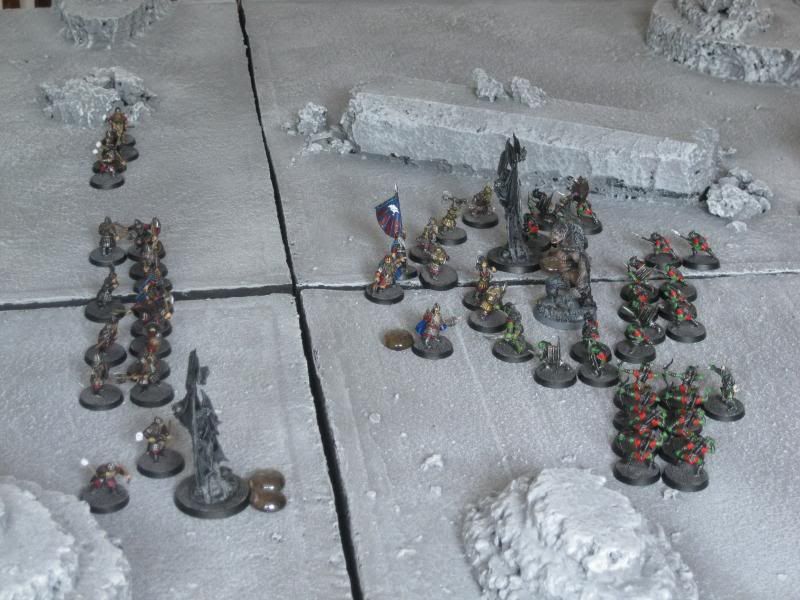
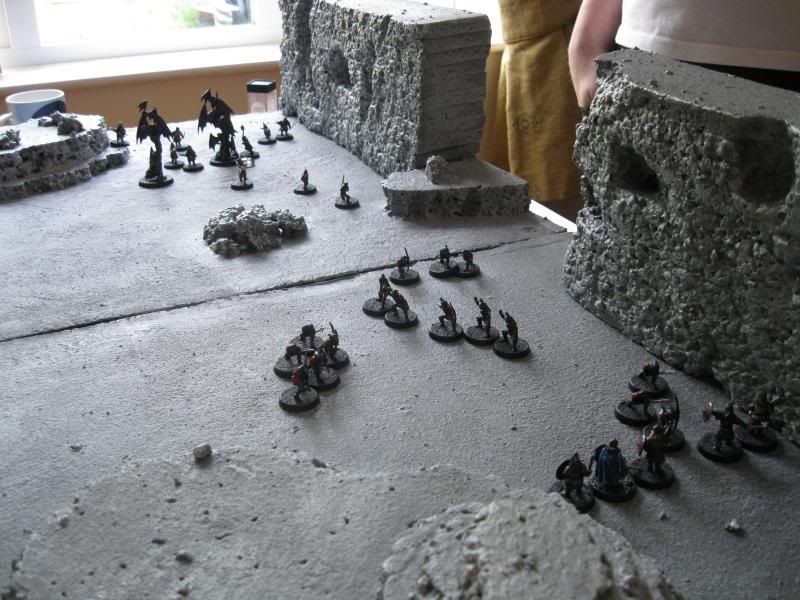
As usual, the Good side had priority in the first turn and Gary wasted no time in rushing as far forwards as he could, as quickly as he could, all the time peppered by the Goblin archers on the hill. The main Goblin force matched the Dwarves step for step, advancing as quickly as possible towards the central hill (location 2) with the majority of their troops but sending a small party across to head off the Dwarfs.

Balin and his Khazad Guard slice their way through the few Goblins
 in their way, as Thrár and his warriors are revealed.

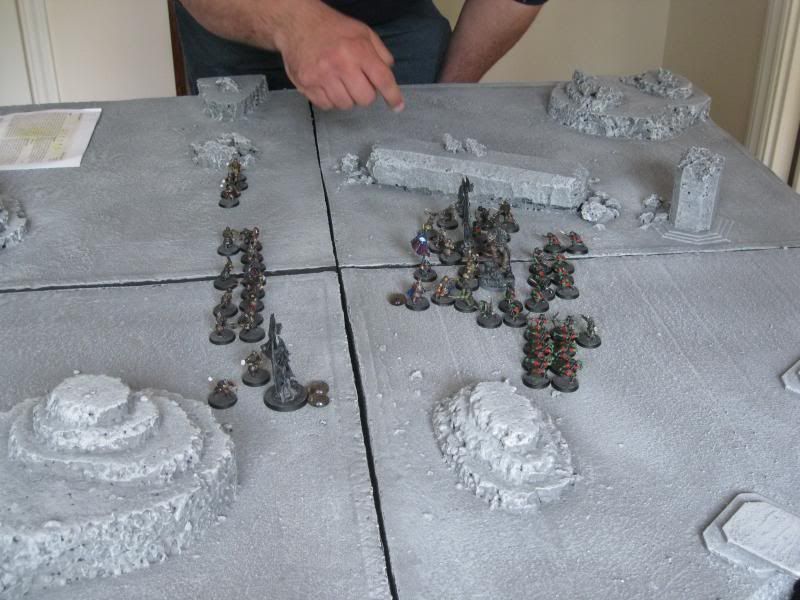
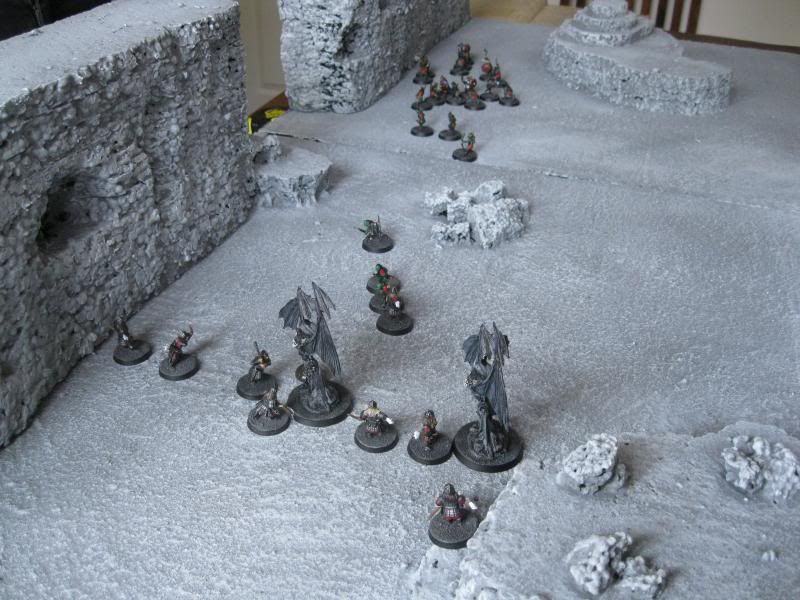
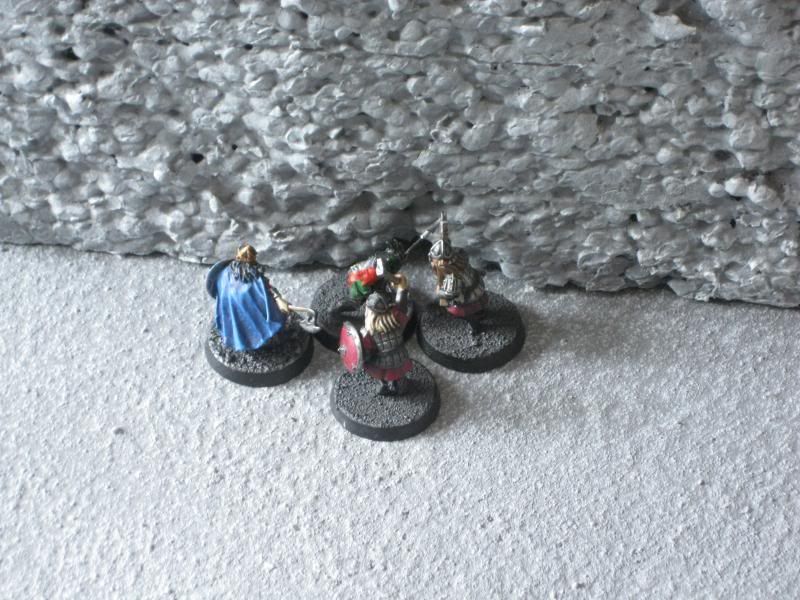
It wasn't long before the Goblins approached the central hill, and were close enough to reveal the paper bearing the name of Thrár. The Dwarf captain and his warriors were placed on top of the plateau, and the Goblins wasted no time in attempting the scale the slopes. With three doughty Dwarf warriors defending the slopes, it proved difficult work as the Goblins struggled to gain a foothold at the top of the climb, with the Dwarves making the most of the narrow heights to limit the number of Goblins who could make it into combat.

Thrár and his warriors fight off the swarm of Goblins at the top of the plateau
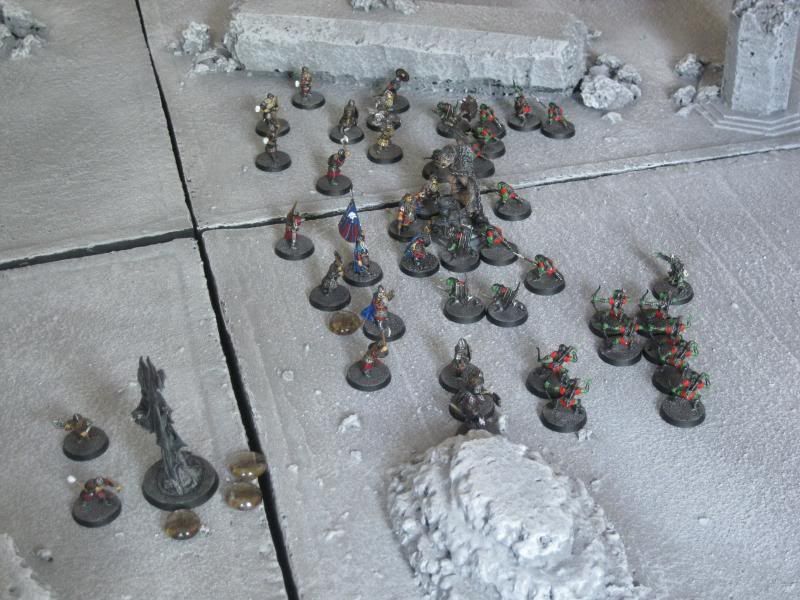
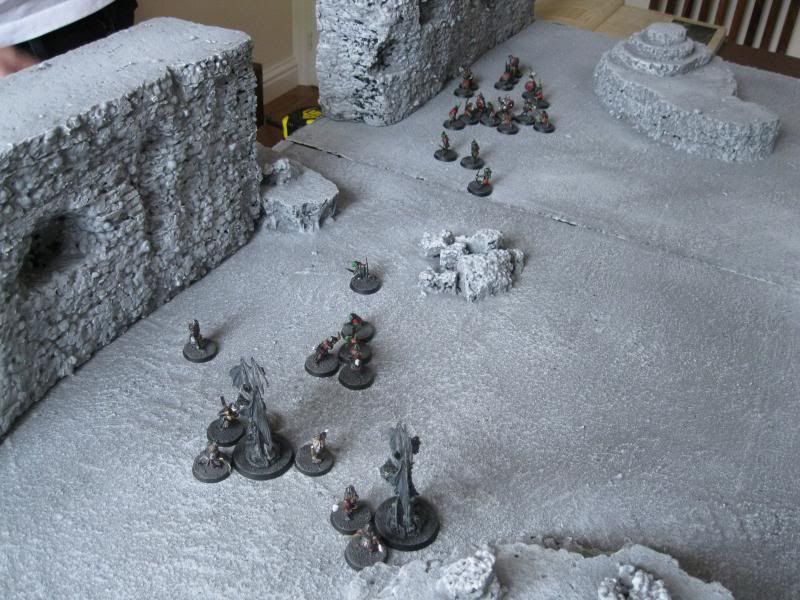
With Thrár and his warriors doing a sterling job of holding off the Goblins on the plateau, Balin and his Khazad Guard had plenty of time to cut their way through those Goblins still left on the ground., including the Drum which turned the tide of the battle once and for all.

With the Drum dead, the upper hand goes to the Dwarves

With only the Goblin bowmen left on the ground, it didn't take long for the Dwarves to begin climbing the plateau to fight alongside Thrár. 

The dwarves continue to cut their way through the Goblins on the plateau
It wasn't long before the Goblins reached breaking point, and as had happened in the previous two games, the Goblin courage didn't last long and the Dwarves quickly swarmed up onto the plateau to deliver the coup de grace to the few Goblins that remained.

Not many left now...
The Dwarves swarm over the remaining Goblins, and quickly put them out of their misery.
So we reach the halfway point of the campaign and the Dwarves are 3-0 up; the best Paul can hope for now is a draw, but he'll have to pull out all the stops to get one! Luckily, the second half of the campaign gets harder for the Dwarves. We'll resume the campaign in Scenario 4 - Kill the Goblin King

Sunday, 18 August 2013

Battle for the Second Hall

It's been a long time since I posted the first part of our ongoing LotR Moria campaign - with summer in full swing though, we've had to deal with holidays, childcare arrangements, more holidays and all sorts of other conundrums that have conspired to limit the playing time we've been able to put into this campaign BUT we're now looking to resume play, and so it's about time I posted up where we are so far and got everyone up to speed! I hereby present the second game of the "Reclamation of Moria" campaign, with the score currently 1-0 to Balin's Dwarves (commanded by Gary).

Scenario 2 - Battle for the Second Hall

The second scenario introduces the main protagonists of the campaign - Balin, Lord of Moria and Durburz the Goblin King. This scenario forms the first of the pitched battles, pitching the majority of each side's forces against each other. Balin and his vanguard have been busily hewing goblins, and now find themselves standing almost alone against the bulk of the Goblin army, waiting for their own reinforcements to catch up.

Forces

Good
Balin
2 Dwarf Captains with shields
6 Khazad Guard
8 Dwarf Warriors with shields*
8 Dwarf Warriors with bows*
3 Dwarf Warriors with two-handed axes
1 Dwarf Warrior with banner

* I had to make a slight adjustment to the forces, adding in two Warriors with bows and two Warriors with shields in exchange for an additional Banner Bearer, due to not being able to get the model ready in time.

Evil
Durburz, the Goblin King
Moria Goblin Shaman
2 Cave Trolls with troll chains
8 Moria Goblins with shields
8 Moria Goblins with spears
8 Moria Goblins with bows
2 Bat Swarms

Deployment

First, Balin and up to twelve additional Good models had to set up within 6" of the board centre. The remainder of the Good force were set up within 3" of the northern board edge. The Evil player begins by deploying the two Cave Trolls within 6" of Balin (note: not within 6" of the centre, within 6" of Balin himself) and then the remaining Evil forces are set up within 3" of the southern board edge.

The white central circle denotes where Balin and his group may deploy. The red ring is not wholly accurate, as the Cave Trolls are deployed depending on the exact position of Balin himself, but gives an idea of the possible position. The white and red areas at the top and bottom of the board denote the main Good and Evil deployment zones, respectively.

Special Rules

Stygian Gloom
Due to the reduced visibility, models may not shoot at targets more than 12" away. However, because it is harder to avoid a shot in the dark, all Shooting attacks receive a +1 bonus on the roll to wound.

Victory

The winner is the side that reduces their opponent to 25% strength or less. If both sides achieve this in the same turn, the result is a Draw. If Balin is slain, the best result the Good side can achieve is a Draw, and likewise for the Evil side if Durburz is slain.

With another non-standard deployment, Gary had a few decisions to make - where to place Balin, and who to choose to accompany him in the centre of the board. In the end, Gary decided to deploy Balin in the very centre of the board, and chose to accompany him with all of the Khazad Guard as well as the Banner Bearer and one of the Captains, which he deployed in a roughly circular cordon around Balin (not knowing where the Trolls would be placed, Gary couldn't afford to leave an avenue unguarded). The rest of the Good force was deployed as close as it could possibly get, with the bowmen out on the flanks and the Dwarf combat warriors packed into the centre ready to pile into the action.

In response, Paul placed by Trolls on his own side of the table (i.e. further away from the mass of Gary's Dwarfs), on either side of the Dwarf cordon (imagine 4 o'clock and 8 o'clock, with Balin being 12 o'clock). The rest of the Goblin forces were deployed in a huge phalanx, ignoring the flanks altogether and with the Bat Swarms placed to swoop into the Trolls' combat at the earliest opportunity.

The game began with the Dwarves taking an aggressive approach and deciding to take the Trolls on head-on, with Balin and two Khazad Guard charging one and another Khazad Guard and the Captain charging the other. The rest of the Dwarves advanced as fast as their little legs could carry them. In response the Goblins did the same, with the Bat Swarms swooping close to the combat and ready to intervene in the second turn.

The first turn begins with the Trolls getting into the thick of things immediately.
Balin and his vanguard took down the first Troll in short order, with no losses in return, but the rest of the Goblin forces were now approaching (and were closer to the combats than the Dwarves, thanks to the movement of the fighting).

The fighting thickens as the Goblins and Dwarfs approach
The early advantages went mostly the way of the Goblins, but they struggled to lands the killing blows to cut through the sturdy Dwarf armour as they failed to capitalise on their streak of winning combats.
The Goblins press the attack while the main Dwarf battleline is still a couple of moves away.
With the Dwarf force within charge range the tide turned on the Goblins as Durburz was brought low by Balin himself and the second Troll collapsed in the same turn. With the collapse of their leader, the Goblins seemingly lost all will to fight as the Dwarves finally crashed into their lines and the momentum of the battle began to swing in favour of Balin's forces.

With Durburz down and the main Dwarf force arriving, the pressure is on the Goblins...
It wasn't long before the superior fighting force of the Dwarves began to tell on the Goblins, with casualties mounting up quickly (on both sides, it must be said). It looked for a moment that the Goblins might hold out, with the Dwarves two models from 50% and the Goblins three models away, but Balin picked his moment to unleash his impressive killing power again and cut down another two Goblins before ploughing into the Shaman and cutting him down too. With the magical boost of "Fury" gone and the Goblins now taking Courage tests, the game was effectively over - with a Courage value of just 2, there weren't going to be many passes and so it proved, and the Evil forces quickly crumbled as the Dwarf march continued.

The demise of the Goblin forces is soon to come...

So the score is now 2-0 to the Dwarves, as the game played out the same as in the first scenario albeit on a larger scale. The Goblins failed to take advantage of their early opportunities, Durburz was carelessly exposed to the best fighter on the Good side (indeed, one of the best fighters in the whole LotR game!) and the debilitating effect of the Bat Swarms wasn't utilised to it's best effect (they have the potential to completely cripple elite fighters like Dwarves) as Paul chose to send them off to chase the Dwarf bowmen, who realistically never formed a threat. 

So could Paul begin to turn things around in Game 3? Stay tuned to find out! 

Sunday, 16 June 2013

Assault on the Eastgate

Time to get started on that backlog of blog posts then!

If you've read the blog of late, you'll no doubt have noticed that my focus recently has been almost exclusively Lord of the Rings, and Moria in particular. The aim was to produce a set of terrain (and the necessary figures) to allow me to run a mini-campaign telling the tale of Balin's attempted reclamation of Khazad-dûm. 

Well, a couple of weekends ago, I reached a stage where the games could begin so I got Paul and Gary together to get the campaign started! We started bright and early (drinks and bacon butties were provided) and Gary and Paul rolled off to decide who would take command of which side. Gary won the roll off and plumped for the Dwarves, leaving Paul to take command of the Moria Goblins.


Scenario 1 - Assault on the Eastgate


The first scenario involves the Dwarf vanguard attempting to gain a beachhead in the caverns of Moria, to open the way for the main force under Balin's command. 

The game was played on a 2'x4' board (using two of the modular boards I've built), with one of the long edges forming the Walls of Moria with the Eastgate itself located in the very centre of the long edge. 

Forces

Good
Dwarf Captain with shield
6 Dwarf Warriors with shields
6 Dwarf Warriors with bows
3 Dwarf Warriors with two-handed weapons

Evil
8 Moria Goblins with shields
8 Moria Goblins with spears
8 Moria Goblins with bows
2 Bat Swarms

Deployment

First, the Dwarves had to split their forces into two equal-sized groups (8 Dwarves in each). One group was then deployed in the north-eastern corner of the board, up to 12" in and 6" deep, as shown on the map below. The second group then deployed in a similar position in the south-eastern corner of the board. Once the Dwarves were deployed, the entire Goblin force deployed within 6" of the Eastgate. Gary split his Dwarves so that the Captain and seven of the non-bow armed Dwarves deployed on the north corner, while the Dwarves with bows and the remainder of the non-bow armed Dwarves deployed to take advantage of the heights in the south corner. Paul established a perimeter with his Goblins; shields at the front, supported by spears, bows in the space behind with the Bat Swarms ready to fly over everyone.


The white boxes show the Dwarf deployment zones;
the red semi-circle is the Goblin deployment area


Special Rules

Unstable Footing
Any Jump or Climb tests taken by any model (except Moria Goblins) suffers an additional -1 dice modifier


~ ~ ~ 
Deployment - it looks like a tough task for the Dwarves to break through the Goblin cordon.

As per normal, the game started with the Good side getting priority. Gary's Dwarves mostly advanced as far as they could, with the bow-armed Dwarves taking up position along the edge of the plateau in order to launch shots against the Goblins. Paul split his forces, with the majority of his models heading north to take on the Dwarf Captain while the remainder went south accompanied by the Bat Swarms.


An odd angle to demonstrate the disposition of both sides. 

The fighting was quickly joined, with Paul initially gaining the upper hand as his Goblin archers scored several unlikely wounds. 
 The Dwarves from the north (left) make a stand in the narrow gap between the
plateau and the Walls to prevent the Goblins from surrounding them.

Meanwhile, the Bat Swarms make a nuisance of themselves but are
unable to make much headway without support from any Goblins.
Eventually though, the Goblin numbers began to dwindle as the Dwarves managed to avoid being ganged up on and arranged several one-on-one fights, which they inevitably won (although it took them some time to slay their enemies - Gary would have made much quicker progress if his dice-rolling was any good!)

The Goblin numbers dwindle, the Dwarves press their advantage
and soon the result is a forgone conclusion
With the Goblin numbers dwindling each turn, it wasn't long before Paul's force was broken and the inevitable failed Courage tests came along (with only Courage 2 and no Heroes to support the warriors, the Goblins were never going to stick around for long once broken). 
The final combat - the Dwarf Captain and two of his warriors close in on the sole remaining Goblin, easily slaying him and ensuring a wipe-out for Gary!


So the first scenario turned out to be a solid victory for Gary, and the Dwarves managed to secure their way into Moria. This initial scenario would prove to demonstrate several recurring traits for the games to come - Gary can't roll To Wound dice for toffee, and Paul's Goblin archers are lethal! 

More to come soon!

Tuesday, 4 September 2012


The world has changed. The Storm of Chaos came and altered the face of the Empire forever. Five years later, the Fall of Middenheim and the Corruption of Carroburg left the north of the country further devastated, and at risk of seceding from the Empire as the Elves of the Laurelorn descended from the forest to wreak havoc amongst human and beast alike.  The once-peaceful city of Marienburg was transformed into a new militaristic and independent country, ready to take advantage of the Empire’s weakness in the wake of almost a decade of war.

Now, war has come to the Old World once again. Karl Franz leads his armies against the great demonic portal in the ruins of Carroburg, while his staunch ally King Louen Leoncoeur of Bretonnia leads a campaign against the newly-founded and aggressive armies of the Free State of Marienburg.

But while King Louen’s back is turned, dark forces rise in his own kingdom. Continued unrest amongst the commoners has driven them to rebellion, and with the majority of the army away, righteous fervour is sweeping the countryside like wildfire drawing more and more of the country folk in. Guided by a shadowy individual known only as the Black Knight, the rebellion is gathering strength with each passing day. 

To make matters worse, the peasant rebellion is not the only force that assails the land. Bands of savages, beasts, orcs and the like, are emerging from the forests and mountains under the loose leadership of the giant Arlukus the Mawsplitter. Accounts from the east report of mercenaries flooding through the mountain passes in great numbers, for what purpose no-one knows. Peasant tales tell of covens of sorcerers, with stories of great magical storms and terrible sounds emanating across the night sky. 

Perhaps most ominous of all, however, are the stories of the Fey. They tell of the Fey once again leaving the forest, and the peasants talk of the Wild Hunt roaming the land once again, and warn each other to bolt their doors and hold their children close against what might emerge from the woods.

Against all this there stands a Knight and his men, charged with the defence of the realm. With the King engaged in the struggle against the Free State of Marienburg, the kingdom of Bretonnia is vulnerable and defended by only those garrisons left behind, scattered across the southern dukedoms. In the forces arrayed against them, the men of Bretonnia face the greatest threat to their country yet.

Asrai.org are proud to present their sequel campaign -

Sentinels of Shadows: Unruly Alliance

~ Battles rage and rebellion is ripe across the southern dukedoms of Bretonnia as dark forces assail the country. With the King away, will you take up your arms in defence of kin and country and join the Defenders of the Realm? Will you ride with the Wild Hunt as the Fey Legion emerge from the Forest of Loren to wreak havoc amongst the lands of men? Will you ally yourself the mysterious Council of Erevos as they enact their plan for the land of Bretonnia? Will you seek your fortune as a mercenary alongside the Brazen Talons? Or will you join the hordes of Arlukus the Mawsplitter in his rampage across the country? Whichever way you decide, you control the fate of Bretonnia as you choose to either support or oppose the Peasant Rebellion that threatens the very fabric of the land.

    ~ A brand new and unique map and movement system means there is more strategy and tactical movement than ever before!

    ~ With both faction and personal resources, players can act independently or as part of a unified team. Spend your spoils to aid your faction, bribe your enemies or achieve personal glory as you choose! 

    ~ Create a unique campaign army through the new Army Doctrine upgrades system! 

    ~ The introduction of Hobby Reports, as well as the ever-popular Fluff Reports, means you don't even have to play games to participate! 

    Faction Registration begins Monday 24th September!


~ ~ ~

It's that time of year again - another nine months of work has almost reached its culmination, and the campaign team at Asrai.org are once again running an online campaign. Building on the events of our first campaign, Crossing Paths, back in October last year we've been hard at work improving every aspect of the campaign. For those people who joined in last time, many thanks and we hope to see you again this time around. For those people that didn't join in last time (why not?!), it would be great to have you! As you can see in the advert, we have even more ways for players to get involved and participate in the campaign without having to play games so there should be no reason for you not to head over to Sentinels-Campaigns.net and join in. 

Sunday, 9 October 2011

Sentinels of Shadows - Crossing Paths Campaign

Today I'm going to take a bit of time out to talk about a subject that's a little bit different - online campaigns.

Some of you will be familiar with the concept of online campaigns; some may never have heard of "normal" campaigns, let alone online ones, so for those of you in the latter category I'm going to start at the beginning...

What is a campaign?

Well, in the most general sense, a campaign is defined as "an operation or series of operations energetically pursued to accomplish a purpose." The word can be applied to anything, from advertising to politics. Of course, where one most often hears of it being used though is in regard to military operations, where a campaign is described as "a large scale, long duration, significant military strategy plan incorporating a series of inter-related military operations or battles forming a distinct part of a larger conflict often called a war." It is this latter definition that is most applicable to what I'm talking about today.

Naturally, we have the Romans to thank for giving us the word "campaign", derived as it is from the plain of Campania, a place of annual wartime operations by the armies of the Roman Republic. But how does this apply to wargaming?

Military in Miniature

Wargaming obviously has a connection to military matters. After all, wargames are strategy games that attempt to deal with military operations of various types, whether real or fictional. Most historical wargamers will have taken part in a refight of a famous battle at some point; Kadesh, Cannae, Hastings, Agincourt, Blenheim, Waterloo, Gettysburg, Stalingrad - there are plenty to choose from. But in the bigger picture, each of these battles is part of a wider conflict, just one action in a war that may have lasted for years. It is this "bigger picture" that campaigns aim to encapsulate. The famous battles are obviously the most well-known and 'popular' (otherwise they wouldn't be famous...) but there are plenty of lesser known but just as important (if not moreso) engagements that either preceded or followed. At it's most basic level, a campaign attempts to present a conflict on a wider scale that demonstrates the action over a series of engagements, rather than on the outcome of a single battle.

Of course, just as with the wargames themselves, campaigns can come in many shapes and forms. Historical refights are one area that certain players may want to extend to cover a series of historical engagements; perhaps a set of battles refighting the D-Day landings and the Battle of Normandy for WWII gamers. In it's most basic form, a wargames campaign is a series of linked battles connected by some sort of continuing narrative. The most basic ones may follow a tree diagram between two players, where the outcome of the first battle determines what the second game is, and so on. Perhaps your army is trying to reinforce your main force and your opponents army is trying to stop you. You fight a Pitched Battle. If your army wins, they reinforce the main army and the next game is a siege while they trap your opponent. If your opponent wins, the next game is an ambush, as your main army is overwhelmed without its reinforcements as backup.

More complex campaigns may involve half a dozen players each with their own army, fighting over a map to control towns, cities, territories or what have you. There may be rules for supply lines, reinforcements, seasonal effects to try and reflect the logistics of a long-term conflict. There may be neutral forces, indigenous natives or packs of dangerous animals that the players have to contend with. All of these things can be added to increase the flavour and "realism" of the campaign, whichever game it is you're playing.

Taking it online

Now that's the basics of a wargames campaign established, but where does the "online" part come into it, I hear you ask? Well, some of you who are familiar with Games Workshop (which I would imagine is most of us...) will likely also remember (or at least be aware of) the worldwide campaigns that they used to organise and run every couple of years in the summer: Storm of Chaos, Nemesis Crown, Eye of Terror, the Fall of Medusa V. These were all online campaigns - players played games, and used the results to influence the results of the campaign and determine a winner, and a campaign story. The players fight for a team (called a faction) in an effort to triumph over the other teams involved in the campaign. Usually these factions are organized roughly by race, by forum or by traditional alliances. Each faction is trying to take as much territory as they can from the others while defending their own. A map is used to represent the area of the world (or worlds) that is being contested. Each faction starts with a small amount of territory and must use points gained by fighting games to capture more.

Those are the very basics of fighting a campaign online, but over the years there have been several online campaigns run by online communities independently to Games Workshop. There are several Warhammer forums out there than organise and run their own campaigns set in the Warhammer world. Over the years, these have gradually built in complexity to become far more immersive and involved than any of the Games Workshop worldwide campaigns ever were. Sites such as Animosity Campaigns, Warhammer-Empire and The UnderEmpire have each run very successful campaigns, with Animosity now building up to their sixth (!!!) online campaign.

Get to the point already...

So why am I telling you all this?

Well, because there is now a new kid on the block in the world of online campaigning. Some of you may know that I'm an Admin on Asrai.org, a Warhammer forum devoted to Wood Elves and Wood Elf players, and in about April 2010 I got together a team to work on an online campaign for Asrai.org to follow in the vein established by other Warhammer sites. Now, after eighteen months of hard work (not to mention blood, sweat and tears...), that campaign is finally ready and waiting to be unleashed upon the unsuspecting masses!


Sentinels of Shadows ~ Crossing Paths

It is the year IC 2527, five years after the coming of the Storm of Chaos and the ravaging of the Empire. Five long years in which the Empire has struggled to recover its lost strength and the forces of darkness have begun to regroup.

Yet the suffering of the Empire is not yet over. In the province of Nordland, the elves of the Laurelorn forest assemble. Provoked by the trespassing of villagers in their hunt for timber to rebuild and concerned by the dark forces advancing on the forest, the elves of the Laurelorn gather to remind their foes why they once feared to enter the woods.

The land is further troubled by news from the east of a greenskin horde rampaging across Ostland and heading west. The remnants of the Waaagh of Grimgor Ironhide, the horde has ravaged Ostland almost to the brink of utter destruction; the armies of the Empire must now march north to face this foe and put a stop to the woe it brings before it can cripple the Empire's bulwark against the north.

This threat could not have come at a worse time for the Empire. In Middenland, the people mourn for the loss of their Elector Boris Todbringer, slain at the hand of his arch nemesis Khazrak the One-Eye. This tragedy has left the province desperately weakened and facing invasion on two fronts; not only the Orc Waaagh to the north-east, but more immediately threatening is the coalition of forces gathering to the south of Middenheim. Dark rumours talk of a shadowy figure known only as the Dagger of Shadows, a warrior who commands the loyalty not only of the beasts but also of foul rat-men, vampires, servants of the Dark Gods and foul daemons of the aethyr.

While the Empire faces two known foes in the open, others move in the shadows to corrupt and subvert. Brigands and outlaws, mercenaries, petty necromancers and warlords all flock to the banner of the one they call the Cockatrice. Little is known of this mysterious figure, or what those who follow him hope to accomplish. Gold? Glory and honour? Or something altogether more sinister? To the nobles of the Empire, these forces appear disorganised and unconnected and thus present no threat but little do they know that each ambush, each robbery, each raid is but one thread in the giant net woven by the Cockatrice. What he hopes to ensnare with this net is unknown, but with the forces that descend on the lands of the Empire it will not be long before the Cockatrice reveals his hand.

Boris Todbringer’s son Hanil is now Elector but although capable, he is untried and untested. Under the advice of his spymaster Rilhert, the new Elector has established a temporary base at Carroburg rather than risk travelling through the Drakwald to reach Middenheim. Guided by the prophecies and premonitions of the captive witch-child Ikena, Rilhert follows the movements of the Empire’s enemies and seeks to find a future in which the Empire can survive these troubled times.


As I mentioned above, this is the culmination of eighteen months' hard work and determination. It's been a long journey, but we've got there in the end! The campaign opens tomorrow 10th October for registration, and begins in a week's time, on Monday 17th October. If you're even the slightest bit interested in campaigns or Warhammer (preferably both!) then it would be great to see you join in. Head to Sentinels-Campaigns.net to get involved!

And just to finish off

Campaigns, for me, are the epitome of what this hobby is all about. They combine all aspects of the hobby - gaming, roleplaying and modelling/painting - into one glorious bundle. Games take on new meaning as they actually become something more than just a bunch of figures on a table, because the fortunes of your army/warband/crew/whatever depend on the outcome. You can invest time and energy giving your figures a background and a history that makes them more than just lumps of lead, and you have the drive to invest more time and energy into the physical appearance of your models when they mean something to you. That perhaps sounds more than a little corny, but it's true nonetheless. Knowing that a bunch of figures are telling a story and perhaps, in some cases, literally changing the world makes me want to invest the time in them to get them painted, write fluff for them and play more and more games with them! For me, campaigns are a self-perpetuating source of motivation in all aspects of the hobby, and being able to share that with people all over the world via the internet makes it all the more inspiring for me.

So if that sounds like something you might be interested in, why not give it a shot and see what you can get out of it?


P.S On an altogether different note, I now have two new followers (doubling the total to 4!). Many thanks to Sylvos and Hoodling! I hope you enjoy my ramblings.