Showing posts with label Battle Report. Show all posts

Tuesday, 10 February 2015

A Stroll In The Woods!

Here's the first of those battle reports I promised. A couple of weeks ago, myself and Paul got together to get in our first game of the year - a 2000pt End Times battle between my "Host of the Eternity King" (an all-elf combo list, although I only used Wood Elves...) and Paul's "Undead Legions" (combining Tomb Kings and Vampire Counts under the infernal leadership of Nagash...)

The Armies

My army list was essentially just a 2000pt Wood Elf list, simply enhanced with the End Times rules.

Spellweaver - Lv.4, Talisman of Preservation and Dispel Scroll, Lore of Light
Glade Captain BSB with Armour of Destiny
10 Glade Guard with Trueflight Arrows and Musician
20 Glade Guard with Trueflight Arrows, Musician, Standard Bearer and Banner of Eternal Flame
29 Eternal Guard with shields and Full Command
7 Wild Riders with Standard Bearer
Great Eagle
Great Eagle

Paul's army looked something like this:

Master Necromancer - Lv.4, Lore of the Vampires
Vampire - Lv.2, Lore of Undeath
Liche Priest - Lv.1, Lore of Nehekhara
Tomb Prince - Great Weapon
Tomb Herald - Battle Standard Bearer
28 Skeleton Warriors with Standard Bearer
24 Crypt Ghouls
22 Grave Guard with Standard Bearer
Necrolith Colossus
10 Skeleton Archers
10 Skeleton Archers
Corpse Cart
Casket of Souls

Deployment


Paul deployed in a block in the corner of the board, with his infantry closely packed around the Corpse Cart. I deployed more centrally, with Wild Riders on the flanks and the Eternal Guard in a position to take on any of Paul's infantry blocks. Paul won the first turn roll off and chose to go first.

Undead T1


Paul began by advancing with everything except the Casket, with the Colossus, Grave Guard and Skeletons marching towards my flank and the Ghouls wheeling slightly to move against my centre. The Skeleton Archers moved just far enough to get into range. 

The magic phase gave the first sign of things to come, as Paul rolled a total of 19 Power Dice while I had 11 Dispel Dice with which to oppose him. In the end, the only noteworthy spell was Gaze of Nagash, which managed to kill four of the Wild Riders on my right flank. Shooting from the Archers killed one of the Wild Riders on my left, and Paul's turn was quickly over.

Wood Elves T1


My own turn began with plenty of movement. The Wild Riders on the right attempted a charge against the Colossus but failed by an inch. Meanwhile both Eagles swooped across the battlefield to make nuisances of themselves, while the left Wild Riders moved around the flank of the wood to threaten the Skeleton Archers. 

Magic gave me a mighty ten Power Dice to play with, while allowing Paul eight Dispel Dice. Repeated castings of Shem's Burning Gaze killed nine of the right-hand Archer unit while Banishment killed seven of the Ghouls, before finally I cast the Net of Amyntok on the unit of Skeleton Warriors. My shooting killed off another five Ghouls and the last of the right-most Archer unit. 

Undead T2


Paul's second turn began with two charges - the Colossus made a 15" charge against the three remaining Wild Riders on the right (rolling 11 on 2d6...), and the Grave Guard attempted a charge against the Eagle, who fled 8" and out of range. Paul then rolled for his Tomb Scorpion, which misfired and entered from the right-hand board edge (which was still mightily inconvenient). The Ghouls, who'd been shot to pieces, decided to back away 2" and the remaining Archers wheeled backwards to shoot at the Wild Riders.

The Magic phase yielded up 20 Power Dice for Paul, and 11 Dispel Dice for me. The Grave Calls raised a unit of 16 Archers, which Paul helpfully placed on the flank of my archers. The Breath of Darkness raised three Ghouls back to unlife, while Soul Stealer took a wound off the Eagle. The Dead Riders brought out my Dispel Scroll, and then a second attempt failed. Paul then attempted to cast spells with the Master Necromancer, who was sat in the Skeleton Warriors. The subsequent Strength tests resulted in four failed attempts, which killed a grand total of 13 Skeletons before Paul successfully passed a test and had chance to cast Invocation of Nehek, which to add to Paul's misery was quickly dispelled. 

Moving swiftly on, Paul's shooting killed three of my right-hand Glade Guard (who passed their Panic test) before failing to do any damage to the left-hand Wild Riders. In combat, the three Wild Riders managed to take a wound off the Colossus before being wiped out in return. 

Wood Elves T2


My turn began with the remaining Wild Riders charging into the Skeleton Archers and the fleeing Eagle rallying. Elsewhere, the right-most Glade Guard unit swift reformed to face the incoming Tomb Scorpion. 

Magic gave me 11 Power Dice to work with against Paul's seven Dispel Dice. My first casting of Shem's Burning Gaze failed, which left Banishment to do the hard work of killing first five Ghouls and then another eight (leaving two alive), before failing on the third attempt. The Net of Amyntok failed, quickly followed by Pha's Protection also failing. 

Shooting saw the right-most Glade Guard take a wound off the Scorpion while the big Glade Guard unit took a wound off the Corpse Cart. The left-hand Glade Guard unit attempted to finish off the Ghouls, but failed to cause any wounds. Meanwhile, the Wild Riders ploughed through the Skeleton Archers and overran to the edge of the board.

Undead T3


Turn three saw the Tomb Scorpion charge just-rallied Eagle, while the other Undead units converged on the Eternal Guard (which I appear to have forgotten on the map above...). Magic gave Paul 23 Power Dice versus my 13 Dispel Dice. To begin things, the Casket of Souls killed two of the elves in the right-hand Glade Guard unit, while the Breath of Darkness raised three more Ghouls to boost the unit to five. The Grave Calls then failed, followed by the Dead Riders, the Harbinger and Gaze of Nagash failing. Paul finally managed to cast Curse of Years on the big Glade Guard unit, killing one. Invocation was dispelled, before a second attempt failed. In a final throw of the dice, the Incantation of Protection also failed. What could have been a devastating magic phase had failed miserably, much to my amusement!

Shooting saw five more Glade Guard fall, this time from the left-most unit. In combat the Scorpion easily killed the Eagle, and then reformed to face the Glade Guard. 

Wood Elves T3


My turn saw the remaining Eagle charge the flank of the much-depleted Ghouls, while the Wild Riders raced around behind the Undead infantry units. The Eternal Guard meanwhile moved up to force the issue with the Undead infantry. Magic saw me gain 10 Power dice against seven Dispel dice. The Net of Amyntok was cast on the Grave Guard, before my attempt to dispel Curse of Years failed dismally. As a result, nine more of the big Glade Guard unit fell. 

What little shooting I had left killed three Skeleton Warriors, while another wound was taken off the Tomb Scorpion. In combat, the Eagle killed one Ghoul, suffered nothing in return and three more Ghouls crumbled, leaving a single Ghoul left alive. 

Undead T4


Time was not on Paul's side at this point, as his units were dying a lot quicker than mine, and also quicker than he could raise reinforcements. In an attempt to force the issue, the Tomb Scorpion charged the right-hand Glade Guard unit while the Grave Guard took the plunge and charged the Eternal Guard. 

Magic saw Paul roll his lowest number of Power dice so far - 15 versus my 11 Dispel dice. The Casket was dispelled first, before the Incantation of Protection was also dispelled to attempt to prevent the Undead gaining the effects of Always Strikes First. Invocation then got through my defence and raised ten Skeletons and seven more Ghouls. The Casket used its Light of Death again, killing the Eagle at last. Curse of Years killed another seven of the big Glade Guard unit (now looking much smaller...), while Paul's shooting killed off the last of the left-hand Glade Guard unit. 

Combat saw the Glade Guard kill the Scorpion before it could strike, while the Eternal Guard killed eight Grave Guard and suffered seven wounds in return, winning the combat by one. 

Wood Elves T4


The Wild Riders charged the newly-boosted Ghouls, with not a lot of movement elsewhere. Magic saw 12 Power dice play nine Dispel dice. Two castings of Banishment saw the unit of Skeleton Archers destroyed, while everything else was dispelled.

Combat saw the Wild Riders destroy the Ghouls and overrun into the rear of the Skeletons. The Eternal Guard killed another eight Grave Guard, losing six in return and winning the combat by four. 

Undead T5


Desperate times call for desperate measures, and Paul threw everything he could into combat. The Colossus charged the Wild Riders while the Corpse Cart charged the Eternal Guard. Magic saw Paul gain another 16 Power dice to work with, against just nine Dispel dice for me. The Casket was dispelled before Paul dubiously cast the Incantation of the Desert Wind in order to gain the benefits from the Corpse Cart. Invocation then raised seven Grave Guard, before the Banner of the Undying Legion raised another seven. 

Combat saw the Wild Riders destroy the Colossus easily, as well as seven Skeletons (with another ten crumbling). The Eternal Guard kill four more Grave Guard and inflict a wound on the Corpse Cart. The Grave Guard kill nine Eternal Guard in return, although the Eternal Guard manage to hold. 

Wood Elves T5


No movement this turn, so we jumped straight to magic. 17 Power dice against 11 Dispel dice, but the only spell I could cast was Speed of Light on the Eternal Guard and Wild Riders (which made very little difference). In the end I was left with nine Power dice unused!

Combat saw the Wild Riders easily wipe out the rest of the Skeletons, along with the Master Necromancer and Liche Priest, suffering a single loss in return. The Eternal Guard were suffering now, as they lost another six wounds in exchange for just a single Grave Guard and another wound on the Corpse Cart. They were left with a single Eternal Guard and the BSB alive.

Undead T6


With nothing to move, Paul went straight to magic and rolled up 22 Power dice, against which I had only ten Dispel dice to defend with. The Grave Calls raised another unit of 16 Skeleton Archers, before a second, third and fourth attempts were dispelled. Unfortunately, the fifth attempt got through and raised 16 more Archers. The Harbinger failed, followed by a sixth attempt at the Grave Calls, and the Abyssal Swarm. Despite raising a ridiculous 32 Archers, they only managed to kill a single Glade Guard.

Combat saw the inevitable deaths of the last Eternal Guard and the BSB, but I had the Wild Riders ready to move in and clean up...

Wood Elves T6


Naturally, the Wild Riders charged into the Grave Guard in an attempt to finish them once and for all. Magic gave me enough dice to Banish the Corpse Cart into oblivion. The Wild Riders easily ploughed through the remaining Grave Guard, and the accompanying Vampire, Tomb Herald and Tomb Prince, but suffered the punishment inflicted by the Tomb Prince's Curse, which wiped them out in return!


In the end, the Undead had only the Casket of Souls remaining of their original army, while I had my Spellweaver and two half-strength Glade Guard units left. Paul had scored 1640VPs against my 2115VPs, ultimately resulting in a very bloody Wood Elf victory!

Saturday, 15 March 2014

Kirkburn Bridge at WMMS

Last weekend saw the 38th West Midlands Military Show take place at Aldersley Leisure Village, near Wolverhampton, and as I briefly mentioned in my last post we took along our "Kirkburn Bridge" game to show. The four of us (Gary, Paul, my old man Kev and myself) had a very enjoyable day out, and to top it off, myself and Paul (the Young 'Uns) led the Scots to victory over the Old Guard (Gary and Kev) which means that Scots are currently 2-1 up in the overall scores for this scenario! 

What follows are the collection of photos I took on the day at various points, which hopefully give a flavour for the course of the game. 


The two forces at the start of the battle - the Scots ensconced in the corner,
with the English moving onto the battlefield from two directions.
Another view showing the English flooding across the river near
 the "kirk" and the bridge (hence the name of the battle!)
Youth vs. Experience - Paul (right) moves the Scots against Gary's (left) English.
Somehow, Youth managed to come out on top (despite Paul's best efforts!)

The Scots in the foreground (mine) shuffle out into a battle line to confront the two incoming English brigades; in the background, Paul makes hard work of defeating Gary's numerically inferior knights.

Hereford's command (background) slogs its way across the field, while in the foreground
Gloucester's command form up to confront the Scots guarding the stream crossing.

What's wrong with this picture? A couple of missing Scottish units,
 as a result of Paul's unusually poor dice rolling!

Meanwhile, the Scottish reinforcements of Moray's command
continually fail to take advantage of the exposed English flanks

Edward Bruce stalwartly prepares the defences on the Scottish left flank, holding up Gloucester's command for the whole game with a couple of units of peasants!

Hereford's command continue their slow progress across the field;
Robert the Bruce wanders over to see what's taking so long...

Meanwhile, Paul's Scots continue to decline all opportunities to break the English resistance -
despite having less than half the number of units, Gary still has the upper hand!

The Duke of Gloucester finally reaches the stream,
while the Scottish peasants taunt him from the higher ground.

Finally, the English resolve breaks (no thanks to Paul!) and
the Scottish flank is cleared, with King Edward taken prisoner! 
Meanwhile, Gloucester's knights finally charge across the river -
Gloucester's retinue (foreground) push back the peasants, and will eventually break them,
while Clifford's retinue suffer the ignominy of defeat and are subsequently routed!
In the background, the rest of the Scots spearmen impatiently wait for Hereford to engage... 

Having defeated and routed Clifford's knights, the De La Haye/Annandale spears decide to take the fight to the English - this proved to be a mistake, as I wandered off leaving Paul in command of my units, and Paul conspired to lose this fight as well! Subsequently, the heroes of the flank turned into villains as they were routed by lowly Welsh archers!

Hereford still shying from engagement, as the Scots continue to hold the line,
with reinforcements arriving in the form of Scottish knights...

Having finally broken the Scottish peasants, Gloucester's remaining cavalry make their way
into the rear of the Scottish lines, but are on the verge of routing themselves...

The view of the field as the battle draws the a close - the English have lost one division (Pembroke's) and are on the verge of losing another (Gloucester's), with Hereford reluctant to commit to the fight. Meanwhile, the Scots hold a strong centre and have a complete division and the remains of the Highland division available as reinforcements. A clear Scottish victory!


And just to round out the day, we were subsequently awarded two awards for our efforts! We were very happy to receive the trophies for 3rd Best Demo Game, and for Best Painted Army! 
So all in all, a very successful day! The Young 'Uns carried the day, despite Paul's best efforts to botch our superiority on the right flank, but more importantly we all had a fantastic day, and thoroughly enjoyed playing, shopping, chatting and meeting lots of people who expressed an interest in our game. 

Many thanks to all those who stopped to look, and to those that stayed a bit longer to stop and chat too! We're hoping to next take the game to Phalanx at St. Helens in June, so for anyone in the North West - look out for us there!

Thursday, 5 December 2013

Wargamer '13 - The Battle of Kirkburn Bridge

It's taken me a few days, but I've finally got round to uploading all the pictures from last weekend's Wargamer show in Great Barr, Birmingham. Yet again, it was a sparsely attended affair, which seems strange considering how many hundreds attend the "West Midlands Military Show" each year just a few miles further up the M6. A distance of just some 15 or so miles from each other, and yet a vast gulf in attendance numbers, which is disappointing. 

Attendance aside though, it was another successful show for us as we put on our "Battle of Kirkburn Bridge c.1314". Loosely taking elements from the battles of Bannockburn, Falkirk and Stirling Bridge, the scenario pitched the hastily assembled Scots of Robert the Bruce against a two-pronged attack from Edward II's English, who themselves had to struggle across two rivers to close on the Scots. 

The Scots had assembled three divisions under the overall command of Robert the Bruce: Robert's brother Edward commanded one half of the Scottish spearmen, while the Earl of Moray brought his own troops to the foray, and Angus og McDonald roused the Highlanders and Islesmen to their king's cause. 

Edward II's forces were more or less evenly divided between three of his earls: the Earl of Pembroke, Aymar de Valance, commanded English Spearmen and his own archers and knightly retinue; Henry de Bohun, the Earl of Hereford, commanded the same, while Gilbert de Clare, the Earl of Gloucester, was given the bulk of the English knights alongside more spearmen and archers. 

For this first outing, Paul was given command of the Scots whilst Gary took the part of Gilbert de Clare (on account of his Gloucester heritage), leaving me with Hereford, Pembroke and Edward II himself. The rules used were 'Hail Caesar' from Warlord Games. So, without further ado, I'll let the pictures do the talking!

The Scots, not certain of the English positions, ready themselves in a corner

The Scottish right flank - Angus og McDonald's Highland division

View from the Scottish right flank

Robert the Bruce surveys his troops

The English enter the field! Pembroke in the bottom-right, Hereford just in
the picture bottom-left and Gloucester in the very far left corner of the board

Pembroke's view of the Scottish left flank in the distance

Hereford makes his entrance, approaching the aforementioned "Kirkburn Bridge"

Gloucester brings his troops on across the ford

The Scottish advance is slow, too slow to prevent the English crossing both the ford and the bridge

Gloucester's knights manoeuvre around the house to avoid the bottleneck

Gilbert de Clare, the Earl of Gloucester himself

The Highlanders slowly make their way out of their deployment zone!

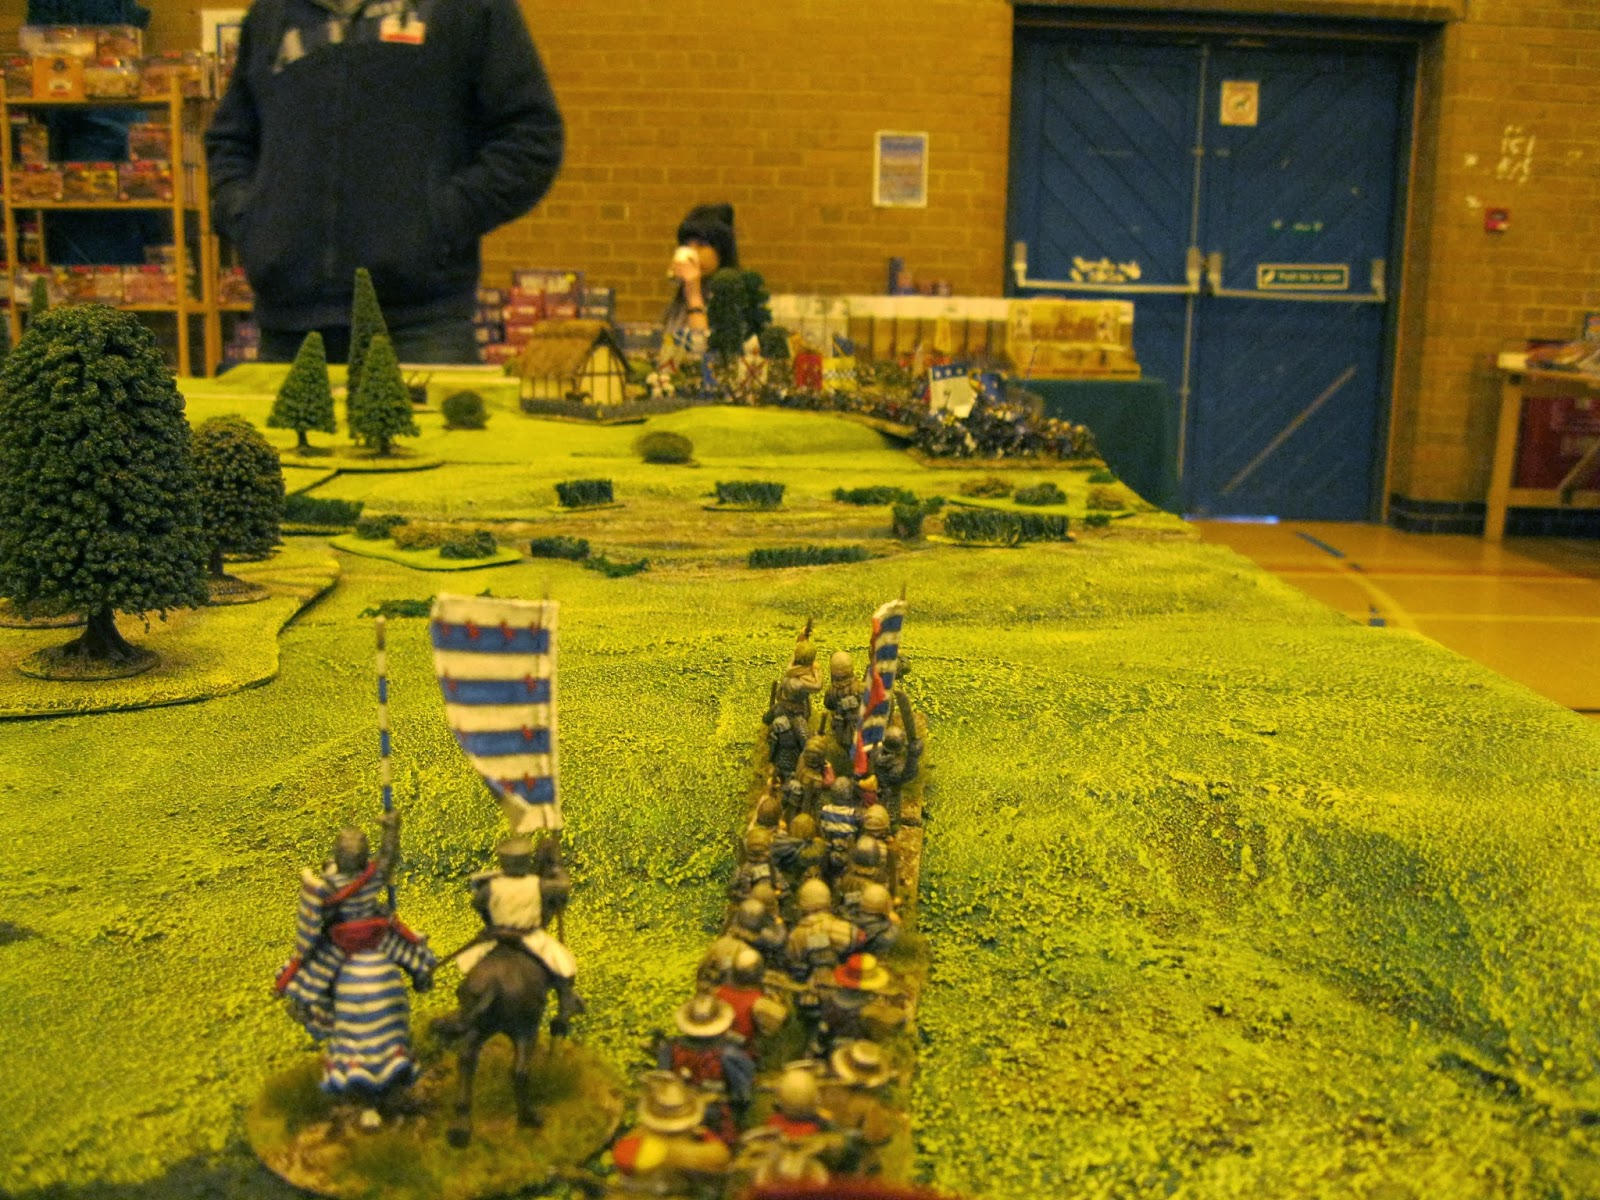
The view of the battlefield as the battle lines approach

The Scots finally get their act together and make more than a single move in a turn!

A (very yellow) shot of the clash in the centre of the board, as units engage across all fronts.

The combat that would prove decisive - Clifford's retinue (along with a few Welsh Javelinmen)
thoroughly trounce the Islesmen, and create a gaping hole in the Scottish flank...

...which allowed the knights to pounce on the vulnerable archers to the Scottish rear.

The Earl of Moray engages in a complete stand-off with the Earl of Pembroke,
with neither command contributing much to the battle...

...leaving Gloucester and his knights to run rampant in the Scottish rear

The Men of Shropshire see off Edward Bruce and his spearmen

The Highlanders and de Monthermer's knights beat seven bells out of each other,
while the rest of the Scottish line gradually falls apart.

The Highlanders finally succumb to the knightly efforts of de Monthermer's retinue, just as Robert the Bruce succeeds in forcing his way through the English line. Too little too late for the Scots though

Meanwhile, Pembroke and Moray's command continue to stare at each other
across the marsh, until Hereford's knights come across to stir things up

It was at this point, with two out of three Scottish brigades utterly trounced and the third completely outnumbered and surrounded, that the English declared victory and the remaining Scots fled with their tails firmly between their legs. It had taken us just a little less than three hours to play to this point, despite regularly stopping to chat to the many people (relatively speaking, given the general dearth of attendees) who expressed an interest in what we were doing and were really impressed with how we were doing it, and so we decided to have a quick break to browse the show and then reset, this time switching commands so that Gary was in charge of the Scots and Paul ended up with Gloucester's command.


The Scots deploy again, and already the game is shaming up to be
a very different affair - a solid wall of spearmen presents itself!

A close up of the Men of Shropshire regiment, with Henry de Bohun in the background.

The Scots advance in unison, still presenting a solid wall of spears on all fronts.

The English repeat their speedy early advance of the first game,
with Pembroke's command determined to make it across the marsh this time!

Once again the battle lines approach, but in the distance events have unfolded much quicker than before...

Unfortunately, up until this point, I have no pictures to detail what had occurred with Paul's command attempting to cross the ford. Whereas in the first game Gloucester's knights had been the ones to break through the Scottish line, the second game saw it all go wrong for Paul again. Preferring to continue advancing in the face of the enemy rather than deploy and take the inevitable charge, Paul's infantry was caught in column soon after crossing the ford and was hurled back against the banks of the river in short order. This left one unit of knights stuck in column in the ford itself and the other stuck in column impotently on the other side of the river. Driven on by their uncontrollable nature (represented by the "Frenzied Charge" rule), the knights were forced onto the Scottish spears and quickly destroyed.

The situation on the Scottish right quickly reaches it's conclusion; in a desperate attempt to break out, Paul throws his last knights and Welsh Javelinmen against Lennox's spearmen blocking the ford. Inevitably, they're thrown back and destroyed in short order. 

Leaving Hereford to face the bulk of the Scottish army, whilst Pembroke
struggles across the marsh in the face of Moray's forces.

Slowly but surely Pembroke makes his way across the marsh and confronts the Scots. 

Edward II leads from the rear!

The Royal Spearmen, backed by the Earl himself, force their way slowly
through the Scots spears, but lose their archers to Moray's knights in return.
It was at this point that we called the game. Pembroke's command was struggling across the marsh, making headway but not quickly enough to assist Hereford. With two untouched divisions of Scottish infantry bearing down on him, the Earl of Hereford was in a pickle and no mistake. While we hadn't played the game to it's conclusion, the utter failure of Gloucester's command had left the other English brigades in an untenable position, and so we awarded victory to the Scots. 

All told, two very quick, bloody and decisive games played, innumerable positive comments and a lot of interest from passersby. We were a bit disappointed not to come away with the award for Best Display Game, especially given the other games on offer (which we were not at all impressed with, by and large). It might seem arrogant to go around "knowing" your game is the best on show, but in this case I truly believe that it was. Wargamer uses a vote to decide the best game, with each group of gamers given a vote. The downside of this system is that it requires people from each display game to actually go around and *look* at the other games on offer, which very few people did. I know for certain that the people who actually came and looked at our game also voted for it, because they all said as much! A vote may be the "fairest" way of deciding the best game at a show, but it also requires the gamers to be active participants in the voting which sadly isn't the case, as many of the gamers at Wargamer are not interested in looking around the show itself...

Anyway, now I've got that bugbear out of the way, I'll get back to the good stuff. I didn't take many pennies with me to the show, on account of the fact that Christmas is coming and I'm also trying to curb my spending when it comes to figures, but I did take the opportunity to pick up some Early Imperial Romans from Colonel Bill's - enough for a unit each of Auxiliary Archers and Auxiliary Cavalry. These will go along nicely with the plastic Roman legionaries I have from Warlord Games (which have been sitting in a box since last year) and a bunch of Foundry Roman Legionaries that I got cheap from Stafford Games a couple of weeks ago. These will form the basis for the first big project of 2014, which I'll go into in a future post!