Monday, 16 September 2013

Getting There Slowly...

A little later than planned (I didn't have chance to take photos until today), here's the next unit for the Wood Elves Repaint - 16 Glade Guard with Musician and Standard, ready to go. As you can see, these are the old single-pose Archers from way back in 5th Edition Warhammer, which is when I first started collecting Wood Elves - these are among the oldest figures in my Warhammer collection, in fact! After nearly 15 years, they've finally been given a decent paint job...


Of course, this now knocks another 16 models off my target for the Warhammer Throne of Skulls in October, leaving me with 48 models in 32 days (so just over a month). Still doable, but I'll need to knuckle down and knock out at least 12 models a week to get it done in time. 


Monday, 9 September 2013

Scouting Party

The next unit for the Wood Elf repaint is complete, and it's probably the next easiest after all the trees being as it only consists of five models! Still, it's another unit down and five more models crossed off the list. Unfortunately, I didn't quite manage my target of getting below the 50-model mark by the end of August, as real life intervened, but I'm close to crossing the big unit of Glade Guard off the list which will see the remaining model count drop by almost a third. Then I'll have roughly a month to polish off the rest. That's doable....right?

In many ways though, these Scouts represent the hardest bit of the army - having no clue as to what colour scheme I was going to go with, other than that it would be a "winter" palette, I had to spend time making those decisions whilst painting the Scouts, with some trial and error along the way. Now that I've managed to settle on a scheme, and on which colours go where, the rest of the work is simply repetition - in theory, that's the easy part. It just means I have to chain myself to the painting desk for the next month and keep painting!


In other news, although I'm somewhat behind schedule on the painting front, I'm getting a fair few games in - I've played three times over the last week, with two Wins and a very narrow Loss. Not bad going considering I'm definitely still learning 8th Edition!

Until next time...

Tuesday, 20 August 2013

6K Mega-Battle!

The Saturday before last saw the first of what will hopefully be many "big battle days" at Stafford Games, and to launch we started with a Warhammer mega-battle! 

We ended up with three players per side with 2000 points each, for a total of 6000 points a side. After a quick discussion about who should side with who (we had several armies to pick from), we ended up with a "Good" alliance of Lizardmen, Ogres and Wood Elves (commanded by Paul, Raven and myself respectively) against an "Evil" muster of Dark Elves allied with two lots of Chaos Warriors (commanded by Ewan, Dayle and Jonathan). 

Forces

2000 points was convenient, as it meant I could use the Wood Elf list I've been trialing of late in preparation for the Throne of Skulls tournament. Paul and Raven's armies looked something like the following:

Slann Mage
2 x 24 Saurus Warriors
10 Cold One Cavalry
2 x 10 Skink Skirmishers
Stegadon
2 x 10 Chameleon Skinks

Ogre Tyrant
Firebelly
2 x 20? Gnoblars (not sure on the numbers of these)
7 Leadbelchers
11 Ironguts
3 Maneaters
3 Mournfang Cavalry
Ironbreaker

The Forces of Destruction lined up like this:

Dreadlord on foot
BSB on foot
Master on Cold One
2 x 15 Repeater Crossbowmen
21 Corsairs
20 Executioners
9 Cold One Knights
Hydra
5 Shades

Tzeentch Sorcerer Lord
Exalted Champion on Daemonic Mount
2 x 30 Nurgle Warriors
3 K'daii Fireborn
Hellcannon

Tzeentch Sorcerer Lord
3 x 21 Khorne Warriors
10 Khorne Knights

Deployment

As myself and Paul were the first to arrive (by quite some time...), we were the ones who got to set up the table. Terrain was randomised as per the rulebook (although we made an impromptu ruling that we would only have a single river - we must have rolled four or five in total, but we didn't fancy fighting in a swamp...)

The table set up. The Coke bottle counted as hard cover (jus' kidding...)
In the end, Paul and myself ended up on the same side, along with Raven, and got to pick table edge (I promise there was no foul play!) To help speed things up a little, as we were already running late, we decided to have each army deploy a unit at a time (so each side deployed three units at a time). It soon became clear that the Good team had a lot more units than the Team Evil did - in fact, my 2000 points of Wood Elves nearly matched the number of units for the whole 6000 points of Evil!

The table following deployment - the Wood Elves take the right flank, facing off against Ewan's Druchii, while the Lizardmen take the centre and the Ogres cram themselves onto the left flank, opposite the two Chaos armies.

The view from the Asrai camp - from here it all looks like a relatively straightforward battle!

Unsurprisingly, Team Evil finished deploying first and gained the +1 for first turn. Jonathan promptly rolled a 1, to which I responded with a casual "Even I can beat that!" Naturally, my dice also came up a 1, and Team Evil chose to take the first turn.

Evil T1

With the armies so far apart, there was little for the Evil armies to do but advance as fast as they could across the table. The only action of note was Dayle managing to roll IF with his first spell on 2d6, and then promptly causing his Sorcerer Lord to lose three Wizard levels and forget three spells! Not a bad start to the game for Team Good! On the plus side, Ewan and Jonathan somewhat made up for Dayle's atrocious luck by chasing away both of Paul's units of Chameleon Skinks (who had been placed to be an early nuisance on either flank).
Evil T1 Movement

Good T1

Buoyed by Dayle managing to cripple his own wizard, the Good armies were mostly happy to sit back and let the Bad Guys™ continue to blow themselves up. The Lizardmen surged up the middle, while the Ogres and Wood Elves mostly held back to draw Team Evil onto their potentially devastating shooting. In an attempt to show Dayle how things were done, Raven's Firebelly successfully cast Fulminating Flame Cave on one of Dayle's Nurgle Warrior units, promptly slaying fourteen of the spiky ones and forcing them to flee!

Good T1 Movement
Evil T2

Team Evil's second turn carried on much the same as their first, although Dayle managed not to blow his own sorcerer up this time. On the right flank, the Frenzied Corsairs were forced to charge the first of my Suicide Pigeons™, who duly fled and left the Corsairs stranded in a Blood Forest. 

Good T2

Time to take the fight to the Evil Ones! Raven's Mournfang Cavalry thundered into the front of Jonathan's Khorne Knights, hoping to break the spiky horsemen and carry on down the left flank. Unfortunately, things didn't quite go to plan and the Mournfangs were promptly slaughtered and run down by the crazed followers of the Blood God. Elsewhere, my Pigeons began their aerial display with the ol' Switcheroo, with the second Eagle taking over suicide duties from the now-rallied first Eagle. Paul's Skinks threw all caution to the wind and sprinted into the sights of Ewan's Repeater Crossbowmen (while my Dryads decided that discretion was the better part of valour, and remained safely ensconced in the nearby Venom Thicket, awaiting the opportune moment). The rest of the Lizardmen continued their slog forward, with the Saurus splitting to either side of the central tower ready to take on the encroaching Chaos Warriors.

Good T2 Movement
Good T2 Left Flank
Evil T3

Following on from his earlier dice rolling, Dayle once again managed the seemingly impossible - needing to roll 4 or greater on 2d6 for his K'daii to charge into Raven's Leadbelchers, Dayle managed to pull out a...3, failing the charge by an inch and leaving his K'daii to stumble forwards into lethal range of the Ogre's cannons. To compound Team Evil's bad luck, Ewan's Cold One Knights chose this as the moment to go Stupid, although he still managed to charge the Shades into Paul's Skinks as Dayle's Chaos Lord ploughed into the Maneaters and the Chaos Knights continued their path of destruction into the flank of the Ironbreaker.

Just to add insult to injury, in the Shooting phase Dayle's Hellcannon proceeded to land a shot right on the Firebelly's head, only to roll a 1 to wound and fail to do any damage at all! After all the bad rolls that had plagued Team Evil so far, it was almost unsurprising when none of their chargers had much success either - the Shades were held up by the Skinks, the Chaos Lord of Killy-death failed to break the Maneaters and the Ironbreaker stubbornly refused to give before the Knights of Khorne.

Evil T3 Movement Left Flank
Evil Movement T3
Good T3

With the Evil army on the back foot, the Forces of Order chose this moment to launch their attack. My Dryads finally emerged from the Venom Thicket to smack into the Corsairs while Raven's Ironguts ploughed into the first of Jonathan's Chaos Warrior units alongside a flanking Gnoblar unit.

Good T3 Movement
Magic saw my Spellweaver finally get into the action, as she Flock of Doom'ed one of Ewan's Repeater Crossbow units and forced them to flee the table. Paul's Slann finally cast something and killed eight Executioners with Fiery Convocation.
The Wood Elf perspective
In combat, the heroic Skinks again managed to hold the Shades (on Insane Courage!). The Dryads soundly thrashed the Corsairs, but failed to catch them by an inch (that would come back to haunt me later...). On the other side of the board, the Ironbreaker finally succumb to the Chaos Knights, but the Ironguts absolutely hammered Jonathan's Chaos Warriors and smacked into the second unit of Warriors behind them (although they failed to catch the fleeing first unit...)

The Good Left Flank
The Ironguts surge through the ranks of the Chaos Warriors, cheered on by the Gnoblars!
Evil T4

In an opportunity gifted to them by careless positioning, Dayle charged his Nurgle Warriors into Paul's first Saurus unit and managed to drag the Slann into the combat as well, who promptly fled. Elsewhere, Ewan's Executioners charged the Skinks in their way, while the Chaos Knights charge into the flank of the Ogre Maneaters, running down the fleeing Ironbreaker in the process.

Evil T4 Movement
Finally, the Hellcannon managed to land a shot on target as it killed six of the unengaged Saurus unit. The main action was in combat, however. Unsurprisingly, the Executioners cut their way through the Skinks with ease but then chose to reform rather than overrun. The Nurgle Warriors performed a similar feat against the Saurus, slicing and dicing the unit into chunks, and then pursuing into the Slann and running the toad down (although the few living Saurus managed to escape). The Khorne Knights and the Chaos Lord finally managed to chop down the last of the Maneaters, but in return the Ironguts continued their rampage through the Chaos ranks as they made mincemeat of the second Khorne Warriors unit and pursued back into the newly-rallied first unit (again failing to catch the fleeing unit they'd just beaten!)

The Nurgle Warriors catch the Slann off guard
Good T4

With the centre collapsing, things had suddenly taken a turn for the worse for the Forces of Order. In an attempt to rescue the situation, the Suicide Pigeons performed a stunning (and somewhat baffling) manoeuvre that saw them blocking off the potential Druchii charges as the Eternal Guard and Treekin rearranged themselves to deal with the inevitable aftermath. Elsewhere, the Stegadon finally trundled into gear as it smacked into the exposed flank of Jonathan's third unit of Chaos Warriors.

Good T4 Movement - some careful manoeuvring by the Wood Elf Aerial Display Team,
plus other ground-based sacrifices
The view across the battlefield
Somewhat surprisingly, the Stegadon made an absolute mess of the Chaos Warriors and chased them down, gaining itself bonus points by running straight into Jonathan's Sorcerer Lord and chasing him down too! Continuing the combat success on the left flank, the Ironguts defeated the first Warriors unit for the second time and this time ran the spiky ones down, and this time succeeded in taking out the second Warriors unit as well!
The Wood Elf perspective again - too many Druchii left alive for comfort
The situation in the centre - the Nurgle Warriors have reformed to face back towards the main action, the Saurus manage to rally and reform to face the rear of the Nurgle Warriors, while the Leadbelchers turn to face the incoming Chaos Knights.
Evil T5

The fifth turn saw a flurry of charges that would possibly settle the game once and for all. The Nurgle Warriors, as expected, charged the rear of my sacrificial Glade Guard unit, the Cold One Knights charged one of the Eagles while the Executioners charged the other, the Corsairs charged into the exposed flank of the Dryads in the Blood Forest (which was careless of me...), while on the other flank the Chaos Knights and Chaos Lord charged into the Leadbelchers.

Evil T5 Movement
Unsurprisingly, the Nurgle Warriors cut down the Glade Guard to a man and reformed to face three potential incoming charges. The Cold One Knights easily slew the first Pigeon and more or less had to reform, due to lack of room to overrun into anything. The Executioners slew the second Pigeon just as easily, and unfortunately the charge angle meant I couldn't avoid having them overrun into the Treekin (ouch...). In the Blood Forest, the Corsairs managed to beat the Dryads narrowly, but they held and managed a combat reform to bring the whole unit into combat (what was left of the unit, anyway). On the other flank, the Knights easily managed to cut their way through the Leadbelchers and overrun into the Saurus Cavalry, while the Chaos Lord overran into the rear of the second Saurus unit

Evil T5 Movement Centre/Left
Good T5

With time quickly running out, we decided this would be the final turn of the game, and it was probably a good thing too as Team Evil were having a bit of a resurgence. In a gamble to turn the game back to the Good Guys, the Eternal Guard and recently-rallied Saurus double-teamed the Nurgle Warriors in an attempt to break them once and for all. Elsewhere, my much-reduced Dryad unit charged into the depleted Repeater Crossbowmen.
Good T5 Movement
Good T5 Movement Centre
Magic was my Spellweaver fail her one attempt at Amber Spear-ing the Hydra, before casting Wyssan's with IF on the Treekin, and blowing up her bodyguard unit of Scouts in the process. 

Unfortunately, things didn't quite go to plan for Team Good - both Dryads were beaten by the Corsairs and Crossbowmen respectively (but importantly manage to hold....), the Treekin were mercilessly cut down by the Executioners, and the Eternal Guard and Saurus failed to break the Nurgle Warriors (with the Saurus being nearly cut down to a man in the process). On the upside though, the Saurus Cavalry finally managed to do something useful as they killed off the Chaos Knights (their one and only contribution to the game).

 ~ ~ ~

With the game over, it was time to tot up the scores. All told, Team Evil had 3489 points left on the table (Dayle 1845, Ewan 1344, Jonathan 300) compared to Team Good's 3611 (Raven 1038, Paul 920 and myself 1653). The Good Guys had claimed four unit standards plus one enemy general (all Jonathan's for 200VPs), while the Bad Guys could claim one banner and one enemy general (all Paul's, for 125VPs) 

The total VPs then were 2711VPs for Team Good, and 2514VPs for Team Evil - a difference of 197VPs; just enough to call it a narrow Victory for Team Good!

All in all though, the overall result didn't really matter - we all had a whale of a time playing the game, and it swung both ways at one point or another, which is what a good game is all about! If we had had time to play the final turn, I think Team Evil would have managed to pull out a win of their own, as they were in a much stronger position at the end of the fifth turn than us Good Guys were. Still, there's plenty of opportunities for a rematch!

Monday, 19 August 2013

More Trees!

Time for more Wood Elves, and the third finished unit of the army so far. Six Treekin, now all fully sculpted and painted (you can see some WiP pics of the back rankers here). This leaves me 60 days to paint the remaining 69 models - certainly achievable. The downside is that this is now all the "easy" stuff out of the way, and the forthcoming elven units will take considerably longer to paint, due to all the added detail and colour variation that will be necessary (unfortunately, I can't just paint them brown and drybrush them like the Dryads and Treekin!) 

Anywho, I'll leave you with some pictures while I crack on with the elves...


The Rescue of Thrár

Scenario 3 - The Rescue of Thrár

In the aftermath of the assault on the Second Hall, Balin's scouting parties come under attack. Balin must mount a daring rescue...

Forces

Good
Balin
Dwarf Captain
8 Khazad Guard
2 Dwarf Warriors with shields

Evil
Goblin Captain
6 Moria Goblins with shields
6 Moria Goblins with spears
6 Moria Goblins with bows
Goblin Drum

Deployment

Thrár and the two Dwarf Warriors begin the game in hiding; the Good player takes three pieces of paper and writes Thrár's name on one of them. He then passes the folded pieces of paper to the Evil player, who places each piece next to some rubble or another suitable terrain feature further than 6" away from each other. This way, neither player knows exactly where Thrár is hiding, but each has a rough idea. Paul placed the pieces of paper at locations 1, 2 and 3 on the map.

Once the papers are placed, the Evil player deploys his force within the Goblin deployment area (as shown on the map, in red). Finally, the Good player deploys Balin and the Khazad Guard within their deployment area (as shown on the map, in white).

The Dwarf deployment zone in white, the Goblin deployment zone in red
and the three possible locations of Thrár's hiding place
Special Rules

Thrár
The hidden Dwarves are not deployed at the start of the game. When a model from either force comes within 6" of a piece of paper is is turned over. If Thrár's name is on the paper then the Good player may place Thrár and the two Dwarves with shields within 1" of the piece of paper. If the paper is blank, simply remove it from the game - Thrár is elsewhere.

Victory

The Good side wins if it manages to kill all of the Evil force or drive them form the field. If Balin or Thrár is slain, the Evil side wins. If both sides meet their victory conditions in the same turn, the game is a draw. 

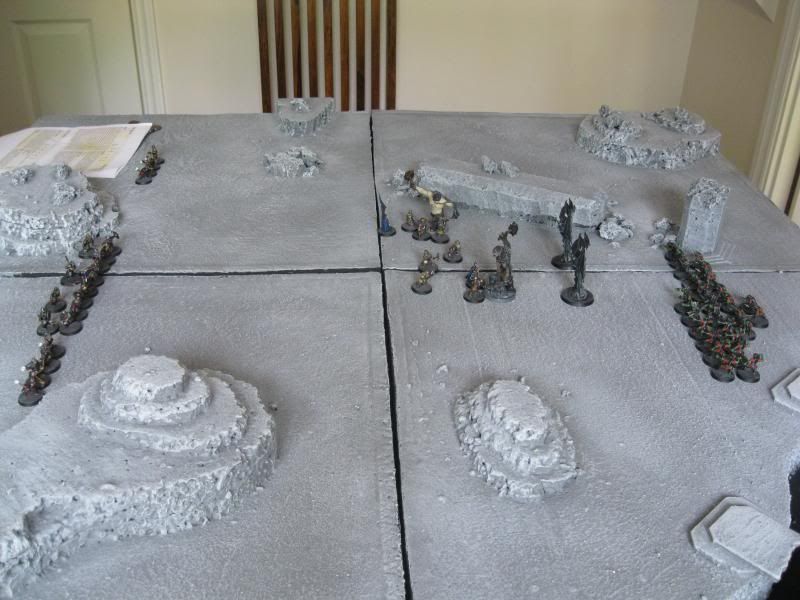
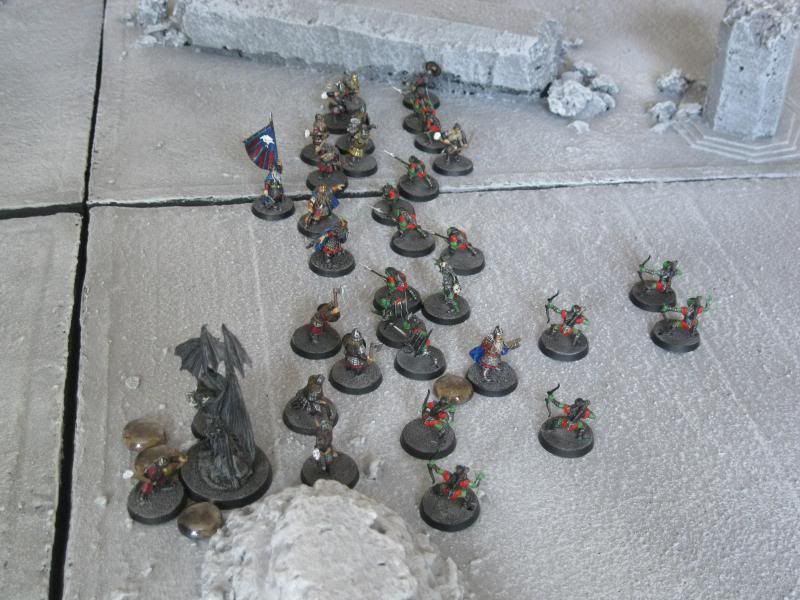
Paul's deployed his forces with the bow-armed Goblins positioned on the hill to pepper the Dwarf advance and the remainder of his forces in the centre ready to make a dash for the nearest piece of paper. Gary stuck all his Dwarves far out on the right flank, which was the only real option if he wanted to avoid getting swamped early.

Deployment
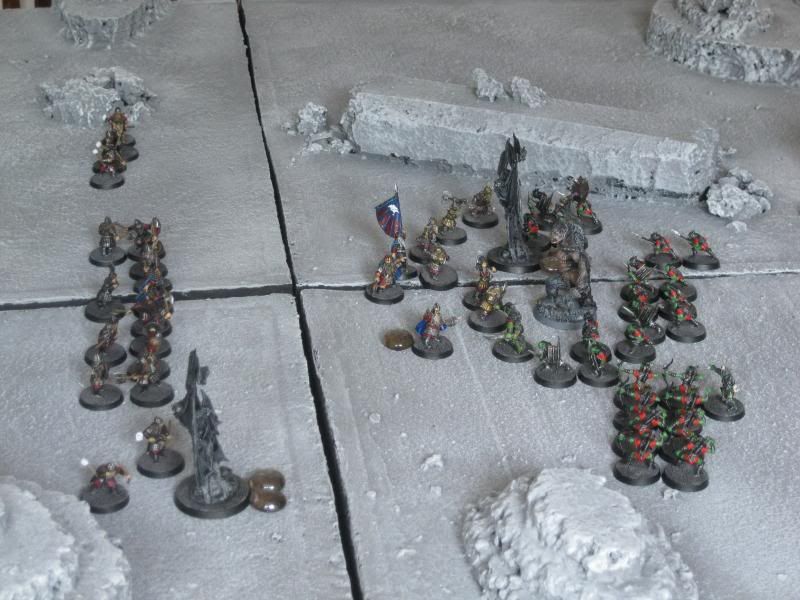
As usual, the Good side had priority in the first turn and Gary wasted no time in rushing as far forwards as he could, as quickly as he could, all the time peppered by the Goblin archers on the hill. The main Goblin force matched the Dwarves step for step, advancing as quickly as possible towards the central hill (location 2) with the majority of their troops but sending a small party across to head off the Dwarfs.

Balin and his Khazad Guard slice their way through the few Goblins
 in their way, as Thrár and his warriors are revealed.

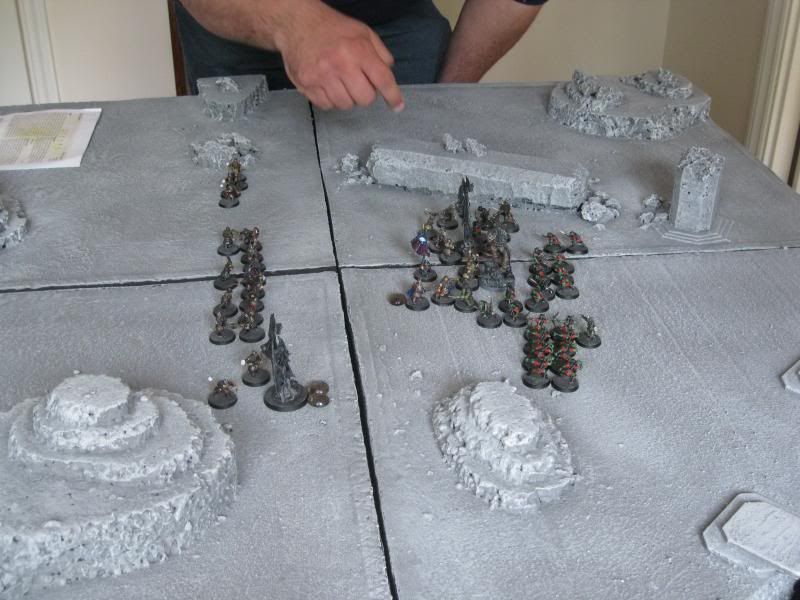
It wasn't long before the Goblins approached the central hill, and were close enough to reveal the paper bearing the name of Thrár. The Dwarf captain and his warriors were placed on top of the plateau, and the Goblins wasted no time in attempting the scale the slopes. With three doughty Dwarf warriors defending the slopes, it proved difficult work as the Goblins struggled to gain a foothold at the top of the climb, with the Dwarves making the most of the narrow heights to limit the number of Goblins who could make it into combat.

Thrár and his warriors fight off the swarm of Goblins at the top of the plateau
With Thrár and his warriors doing a sterling job of holding off the Goblins on the plateau, Balin and his Khazad Guard had plenty of time to cut their way through those Goblins still left on the ground., including the Drum which turned the tide of the battle once and for all.

With the Drum dead, the upper hand goes to the Dwarves

With only the Goblin bowmen left on the ground, it didn't take long for the Dwarves to begin climbing the plateau to fight alongside Thrár. 

The dwarves continue to cut their way through the Goblins on the plateau
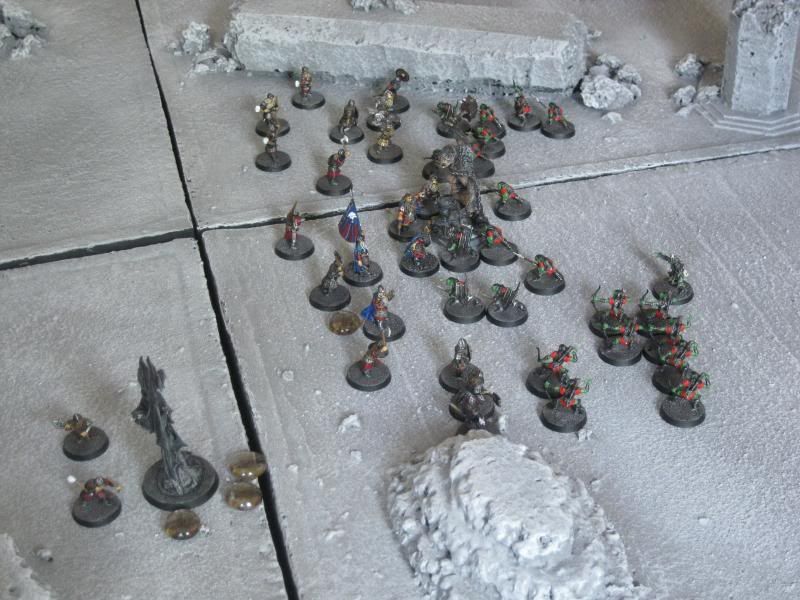
It wasn't long before the Goblins reached breaking point, and as had happened in the previous two games, the Goblin courage didn't last long and the Dwarves quickly swarmed up onto the plateau to deliver the coup de grace to the few Goblins that remained.

Not many left now...
The Dwarves swarm over the remaining Goblins, and quickly put them out of their misery.
So we reach the halfway point of the campaign and the Dwarves are 3-0 up; the best Paul can hope for now is a draw, but he'll have to pull out all the stops to get one! Luckily, the second half of the campaign gets harder for the Dwarves. We'll resume the campaign in Scenario 4 - Kill the Goblin King

Sunday, 18 August 2013

Battle for the Second Hall

It's been a long time since I posted the first part of our ongoing LotR Moria campaign - with summer in full swing though, we've had to deal with holidays, childcare arrangements, more holidays and all sorts of other conundrums that have conspired to limit the playing time we've been able to put into this campaign BUT we're now looking to resume play, and so it's about time I posted up where we are so far and got everyone up to speed! I hereby present the second game of the "Reclamation of Moria" campaign, with the score currently 1-0 to Balin's Dwarves (commanded by Gary).

Scenario 2 - Battle for the Second Hall

The second scenario introduces the main protagonists of the campaign - Balin, Lord of Moria and Durburz the Goblin King. This scenario forms the first of the pitched battles, pitching the majority of each side's forces against each other. Balin and his vanguard have been busily hewing goblins, and now find themselves standing almost alone against the bulk of the Goblin army, waiting for their own reinforcements to catch up.

Forces

Good
Balin
2 Dwarf Captains with shields
6 Khazad Guard
8 Dwarf Warriors with shields*
8 Dwarf Warriors with bows*
3 Dwarf Warriors with two-handed axes
1 Dwarf Warrior with banner

* I had to make a slight adjustment to the forces, adding in two Warriors with bows and two Warriors with shields in exchange for an additional Banner Bearer, due to not being able to get the model ready in time.

Evil
Durburz, the Goblin King
Moria Goblin Shaman
2 Cave Trolls with troll chains
8 Moria Goblins with shields
8 Moria Goblins with spears
8 Moria Goblins with bows
2 Bat Swarms

Deployment

First, Balin and up to twelve additional Good models had to set up within 6" of the board centre. The remainder of the Good force were set up within 3" of the northern board edge. The Evil player begins by deploying the two Cave Trolls within 6" of Balin (note: not within 6" of the centre, within 6" of Balin himself) and then the remaining Evil forces are set up within 3" of the southern board edge.

The white central circle denotes where Balin and his group may deploy. The red ring is not wholly accurate, as the Cave Trolls are deployed depending on the exact position of Balin himself, but gives an idea of the possible position. The white and red areas at the top and bottom of the board denote the main Good and Evil deployment zones, respectively.

Special Rules

Stygian Gloom
Due to the reduced visibility, models may not shoot at targets more than 12" away. However, because it is harder to avoid a shot in the dark, all Shooting attacks receive a +1 bonus on the roll to wound.

Victory

The winner is the side that reduces their opponent to 25% strength or less. If both sides achieve this in the same turn, the result is a Draw. If Balin is slain, the best result the Good side can achieve is a Draw, and likewise for the Evil side if Durburz is slain.

With another non-standard deployment, Gary had a few decisions to make - where to place Balin, and who to choose to accompany him in the centre of the board. In the end, Gary decided to deploy Balin in the very centre of the board, and chose to accompany him with all of the Khazad Guard as well as the Banner Bearer and one of the Captains, which he deployed in a roughly circular cordon around Balin (not knowing where the Trolls would be placed, Gary couldn't afford to leave an avenue unguarded). The rest of the Good force was deployed as close as it could possibly get, with the bowmen out on the flanks and the Dwarf combat warriors packed into the centre ready to pile into the action.

In response, Paul placed by Trolls on his own side of the table (i.e. further away from the mass of Gary's Dwarfs), on either side of the Dwarf cordon (imagine 4 o'clock and 8 o'clock, with Balin being 12 o'clock). The rest of the Goblin forces were deployed in a huge phalanx, ignoring the flanks altogether and with the Bat Swarms placed to swoop into the Trolls' combat at the earliest opportunity.

The game began with the Dwarves taking an aggressive approach and deciding to take the Trolls on head-on, with Balin and two Khazad Guard charging one and another Khazad Guard and the Captain charging the other. The rest of the Dwarves advanced as fast as their little legs could carry them. In response the Goblins did the same, with the Bat Swarms swooping close to the combat and ready to intervene in the second turn.

The first turn begins with the Trolls getting into the thick of things immediately.
Balin and his vanguard took down the first Troll in short order, with no losses in return, but the rest of the Goblin forces were now approaching (and were closer to the combats than the Dwarves, thanks to the movement of the fighting).

The fighting thickens as the Goblins and Dwarfs approach
The early advantages went mostly the way of the Goblins, but they struggled to lands the killing blows to cut through the sturdy Dwarf armour as they failed to capitalise on their streak of winning combats.
The Goblins press the attack while the main Dwarf battleline is still a couple of moves away.
With the Dwarf force within charge range the tide turned on the Goblins as Durburz was brought low by Balin himself and the second Troll collapsed in the same turn. With the collapse of their leader, the Goblins seemingly lost all will to fight as the Dwarves finally crashed into their lines and the momentum of the battle began to swing in favour of Balin's forces.

With Durburz down and the main Dwarf force arriving, the pressure is on the Goblins...
It wasn't long before the superior fighting force of the Dwarves began to tell on the Goblins, with casualties mounting up quickly (on both sides, it must be said). It looked for a moment that the Goblins might hold out, with the Dwarves two models from 50% and the Goblins three models away, but Balin picked his moment to unleash his impressive killing power again and cut down another two Goblins before ploughing into the Shaman and cutting him down too. With the magical boost of "Fury" gone and the Goblins now taking Courage tests, the game was effectively over - with a Courage value of just 2, there weren't going to be many passes and so it proved, and the Evil forces quickly crumbled as the Dwarf march continued.

The demise of the Goblin forces is soon to come...

So the score is now 2-0 to the Dwarves, as the game played out the same as in the first scenario albeit on a larger scale. The Goblins failed to take advantage of their early opportunities, Durburz was carelessly exposed to the best fighter on the Good side (indeed, one of the best fighters in the whole LotR game!) and the debilitating effect of the Bat Swarms wasn't utilised to it's best effect (they have the potential to completely cripple elite fighters like Dwarves) as Paul chose to send them off to chase the Dwarf bowmen, who realistically never formed a threat. 

So could Paul begin to turn things around in Game 3? Stay tuned to find out!