In around 6 hours time, we'll be heading to the WMMS (West Midlands Military Show) at Aldersley Leisure Village once again for the second outing of the Battle of Steinkirche. With most of the essentials already done for the first outing at Wargamer in December '11, there wasn't too much that needed adding but nevertheless Gary and myself (mainly Gary, as usual...) have been tinkering away with various additions and "improvements". More trees and hedges, various vignettes, assorted wildlife and livestock, and odd little bits of scenery have taken shape over the past few weeks and will be added to the table for the Second Battle of Steinkirche.
As an aside, I've been working on a special "project" hoping to get it ready for the show. Unfortunately, it's not going to be, but that gives me more time to get it finished and perfected for next time. It also gives me the opportunity to post up some WiP stuff on the blog, so look out for that.
Once more, we'll be ably assisted by our associates from Stafford Gamers who are turning out to swell the ranks. We've set things up so that those who played as the Imperialists last time get a chance to do the attacking and play as the Swedes, but we'll see how it goes when we get there.
Finally, if by some extraordinary coincidence you happen to be reading this blog, and you're going to the WMMS tomorrow (today!) then do pop by and say hello, and maybe stop for a chat. If you're not there (or you're not reading this blog...) then you can look forward to plenty of pictures that I'll be sure to take.
Sunday, 11 March 2012


Friday, 2 March 2012
Potential Recruits?
Just seen these on Forge World (via Tabletop Fix). They're Skin Wolves, and although they're designed for Chaos armies, my first thought was "Rat Ogres". With a few suitable Moulder "improvements", I think they'd fit right in (and they're waaaay better than the current Rat Ogres sculpts*, and open to far more variation than the IoB Rat Ogres). And at £32 for 3, they're not that much more expensive than similar sized models straight from GW (plus they have the added advantage of guaranteed Forge World quality, rather than potentially-catastrophic Finecast quality...)
Thoughts, comments and suggestions welcome!
*The boxed set versions anyway. I really like the IoB Ogres, but they're one-piece models and there are only two variations, which doesn't leave much room for modification without hacking them to pieces (which is something I'm not comfortable doing, nor confident of pulling off).
Thoughts, comments and suggestions welcome!
 |
| Copyright Forge World |
 |
| Copyright Forge World |
 |
| Copyright Forge World |
Thursday, 23 February 2012
Muster the Rohirrim!
Time for some pictures then. I've collected quite a bit of LotR stuff over the years, and as I've said previously it's probably the game I've played most in the past few years, by virtue of the fact that it's quick and easy to play, and doesn't require carting around massive collections of figures.
Anyway, the first force I collected was always going to be Rohan. The Battle of Helm's Deep and the charge across the Pelennor Fields are my favourite parts of the movie trilogy, and the strong Anglo-Saxon influences in the books, films and models instantly captured my attention.


Even though the Rohirrim are my favourite LotR force, I started my collection with the original Fellowship of the Ring boxed game, along with the Fellowship itself. As the primary characters of the three books, it would have been a heinous crime not to possess them in miniature form!

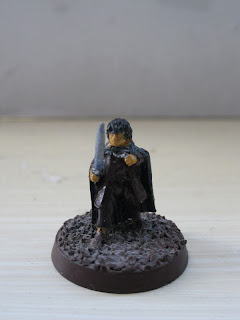


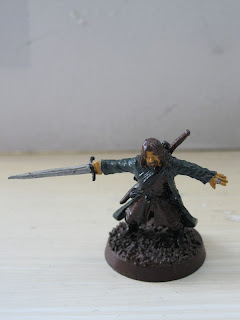

Alas, my initial attempts at doing the figures justice are rather poor. Some day I'll go back and repaint them, but my 13 year old self was simply too eager to get them painted!
That's all for now! Keep your eyes peeled for more in a future post...
Anyway, the first force I collected was always going to be Rohan. The Battle of Helm's Deep and the charge across the Pelennor Fields are my favourite parts of the movie trilogy, and the strong Anglo-Saxon influences in the books, films and models instantly captured my attention.
 |
| No Rohan army would be complete without Theoden |

 |
| Likewise, Eomer is a necessity |
 |
| The Rohirrim ride to war |
 |
| Dismounted Warriors of Rohan form up |

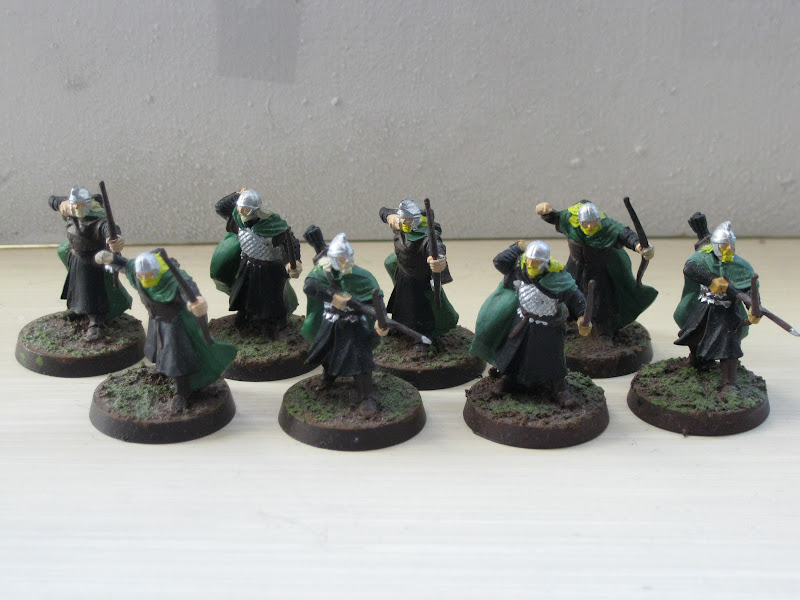 |


Alas, my initial attempts at doing the figures justice are rather poor. Some day I'll go back and repaint them, but my 13 year old self was simply too eager to get them painted!
That's all for now! Keep your eyes peeled for more in a future post...
Pause for Thought
Following on from the battle report I posted yesterday (viewable here), there was one other issue that was brought to mind. It wasn't about the game itself, or even the army, but the figures.
The 1500pt list contains 86 infantry models (20mm bases), 10 Monstrous infantry models (40mm bases), two weapons teams (25x50mm bases) and a Doomwheel (100x50mm base). That's 99 models in all. Now, coming from a background as a Wood Elf player, I've never used an army with 99 models in it! The biggest 3k list I've ever used for my Wood Elves has 109 figures, and that's twice the points size of my Skaven army...
Not only is it quite a lot of figures for such a small army but the figures are also bulky, with lots of sharp pointy sticky-outy bits. Both units of Clanrats were magnetised to their movement trays for the primary purpose of making storing and moving them easier. Transporting the army is another issue entirely.
Up until now, the humble GW Figure case has done the job of transporting everything I've needed for my games - a Wood Elf army fits in there perfectly, along with the books and equipment necessary to play. Not so with the Skaven; the Clanrats can't stay on their movement trays (which largely defeats the point of magnetising the trays in the first place...), and the Doomwheel won't fit at all.
The long and short of this ramble then is that I need to find a better way of transporting the army. The current list (i.e. everything I've got painted so far) takes up all three trays of the GW figure case already, so once the army expands beyond 1500pts it will become a struggle to carry everything I need. I've managed to pick up another GW figure case on the cheap, so that will alleviate the problem in the short term. I'd rather carry around two figure cases than one figure case and a bunch of boxes and books. But in the long-term, I'd ideally like to be able to carry around everything I need in a single case/bag, and I'd like to be able to magnetise things so that I can pick them up straight out of the case/bag (rather than load and unload individual models from foam trays...)
Of course, I might be asking too much. It's not really such a problem having to load and unload all of the Clanrats from foam trays, it's just an inconvenience. Ideally though, I'd like to be able to just be able to pick up a unit and put it on the table rather than spending time faffing around ranking every model up on the trays and then putting them all back into the foam at the end of the game. I'll keep my eyes open for a case that does everything I want, but in the meantime the two GW figure cases should suffice for now.
The 1500pt list contains 86 infantry models (20mm bases), 10 Monstrous infantry models (40mm bases), two weapons teams (25x50mm bases) and a Doomwheel (100x50mm base). That's 99 models in all. Now, coming from a background as a Wood Elf player, I've never used an army with 99 models in it! The biggest 3k list I've ever used for my Wood Elves has 109 figures, and that's twice the points size of my Skaven army...
Not only is it quite a lot of figures for such a small army but the figures are also bulky, with lots of sharp pointy sticky-outy bits. Both units of Clanrats were magnetised to their movement trays for the primary purpose of making storing and moving them easier. Transporting the army is another issue entirely.
Up until now, the humble GW Figure case has done the job of transporting everything I've needed for my games - a Wood Elf army fits in there perfectly, along with the books and equipment necessary to play. Not so with the Skaven; the Clanrats can't stay on their movement trays (which largely defeats the point of magnetising the trays in the first place...), and the Doomwheel won't fit at all.
The long and short of this ramble then is that I need to find a better way of transporting the army. The current list (i.e. everything I've got painted so far) takes up all three trays of the GW figure case already, so once the army expands beyond 1500pts it will become a struggle to carry everything I need. I've managed to pick up another GW figure case on the cheap, so that will alleviate the problem in the short term. I'd rather carry around two figure cases than one figure case and a bunch of boxes and books. But in the long-term, I'd ideally like to be able to carry around everything I need in a single case/bag, and I'd like to be able to magnetise things so that I can pick them up straight out of the case/bag (rather than load and unload individual models from foam trays...)
Of course, I might be asking too much. It's not really such a problem having to load and unload all of the Clanrats from foam trays, it's just an inconvenience. Ideally though, I'd like to be able to just be able to pick up a unit and put it on the table rather than spending time faffing around ranking every model up on the trays and then putting them all back into the foam at the end of the game. I'll keep my eyes open for a case that does everything I want, but in the meantime the two GW figure cases should suffice for now.
Wednesday, 22 February 2012
Take #2: Greyclaw Tries Again...
After the dismal display of generalship (or lack thereof) from Greyclaw in his first battle (which you can read about here), it was only a matter of time before he plucked up his courage and took to the table top once again. Monday saw me play Paul again, but this time he had a shiny new book: he'd picked up the new Vampire Counts army book and was desperate to try them out. I agreed, sure in the knowledge that this second outing of Clan Rictus couldn't be much worse than the first...
The desire to play with a fully painted army overcame the need to make changes to the list, and so I stuck with what I used in the first game:
Warlord Queek Greyclaw ~ 191pts
- Armour of Silvered Steel, Foul Pendant, Poisoned Attacks, Tail Weapon, Additional Hand Weapon
Warlock Engineer Snikch Kraventail ~ 155pts (Warp Lightning, Howling Warpgale)
- Lv.2, Warpmusket, Warlock Optics, Warp-Energy Condenser
Clanrats (40) ~ 285pts
- Full Command, Spears, Shields, Poisoned Wind Mortar
Clanrats (40) ~ 285pts
- Full Command, Spears, Shields, Poisoned Wind Mortar
Rat Ogres (5) ~ 216pts
- 2 Packmasters
Rat Ogres (5) ~ 216pts
- 2 Packmasters
Doomwheel ~ 150pts
Total = 1498pts
Paul's new-fangled list was something like this:
Master Necromancer (Invocation of Nehek, Gaze of Nagash, Wind of Death, Raise Dead)
- Lv.4, Master of the Dead
Vampire (Invocation of Nehek, Hellish Vigour)
- Red Fury, Sword of Strife, Lv.2
Tomb Banshee
15 Ghouls
15 Ghouls
18 Skeletons
- Full Command
18 Skeletons
- Full Command
Corpse Cart
3 Vargheists
- Vargoyle
Varghulf
Pre-game and Deployment
I rolled Warp-Lightning and Howling Warpgale straight off, which was fortunate - Howling Warpgale might help to mitigate those nasty Vargheists flying across the table, and Warp-Lightning is a Warlock Engineer's spell of choice.
Paul started off by rolling Vanhel's and Hellish Vigour, and chose to swap Vanhel's for Invocation. The Necromancer picked up Invocation, Wind of Death, Gaze of Nagash and Raise Dead.

I lost the roll-off for deployment and was made to place first. The two Clanrat units took the centre, flanked by their respective Mortars who were flanked in turn by the two units of Rat Ogres. The Doomwheel went out on the right flank.
Paul proceeded to avoid the Doomwheel and load his own right flank with the Varghulf, Banshee and Vargheists. The infantry took up position opposite my own troops, a symmetrical deployment with a unit of Ghouls and Skeletons on either side of the Corpse Cart. The Necromancer hid behind one unit of Ghouls while the Vampire hid behind the other.
I won the roll-off for first turn, and took it.
Turn 1 Skaven
A very brief movement phase opened the game, with the Doomwheel advancing down the right flank and the Clanrats edging forward so that the Warlock Engineer was within range for some Warp-Lightning action.
Magic came and rolled 5PD, with 3DD. I forgot the Warp-Energy Condenser again, and failed to channel, but Howling Warpgale went through along with Warp-Lightning on the left-hand Ghouls killing 5 of them.
The Doomwheel driver failed his Ld test not to shoot, and the Wheel ending up zapping the nearest Rat Ogres, causing 10 wounds! Ouch!! Meanwhile, the right-hand PWM lands a globe right on top of the right-hand Ghouls and kills 5 of them, and the left-hand PWM aims for the left-hand Ghouls but ends up catching the back of the Skeletons, killing 2.
Turn 1 Vampires

The Undead begin their march forward; the nasties on the left flank advance ahead of the infantry (although the Vargheists are thankfully stymied by Howling Warpgale). The Skeletons on the far right wheel to face the Doomwheel while the rest of the infantry move straight fowards.
Magic generates 7PD, with 5DD. Invocation from the Vampire raised the right-hand Ghouls back up to full strength. Gaze of Nagash casts, but I chose to let it go through for the loss of two Clanrats. The final attempt at Invocation is thoroughly dispelled.
Turn 2 Skaven
Both units of Rat Ogres are forced to charge at the Varghulf and right-hand Skeletons respectively, but a poor set of rolls sees both charges fail and the Rat Ogres shuffle forwards. The Doomwheel suffers a similar bout of bad rolling, and trundles forwards a paltry 6". The Clanrats advance to maintain the line.
Magic comes around and I get a massive 12PD to work with. Quite perplexed as to what to do with this new-found power, the Warlock Engineer proceeds to roll three 6s on four dice when casting Warpgale and causes a Calamitous Detonation, killing 3 Clanrats and wounding himself.
Meanwhile, in the Shooting phase, the Doomwheel zaps 3 Skeletons from the right-hand unit, one of the PWMs kills 3 Skeletons from the other unit and the final PWM shot misses everything by a country mile.
Turn 2 Vampires

The first successful charges of the game as the Vargheists and Varghulf charge the left-hand Rat Ogres. Everything else advances, and the slight bottleneck means we're relatively evenly matched in the centre.
Another poor roll for magic sees the Undead given a paltry 4PD to work with. Despite all that, Invocation manages to cast big and pretty much raises everything I'd killed thus far. The only Vampire shooting of the game sees the Banshee attempt to scream the PWM to death, only to fail dismally.
Combat gets pretty brutal as the Varghulf and Vargheists inflict a total of 11 wounds on the Rat Ogres. The Ogres inflict 7 wounds back against the Vargheists, but only manage 1 against the Regenerating Varghulf. The resulting break test sees the Ogres flee off the table. While the last Vargheist pursues, the 'gulf reforms to face the flank of the nearby Clanrats. Uh oh...
Turn 3 Skaven
A series of charges from the rats; both Clanrat units charge the Ghouls in front of them, while the remaining Rat Ogre unit charges the right-hand Skeletons. The Doomwheel then ploughs into the flank of the same Skeletons. Somewhat unsurprisingly, Greyclaw's unit of Clanrats manage to fail their Fear test...
No magic as the Engineer was engaged in combat, and so straight onto shooting. The Doomwheel zaps another 3 Skeletons, while the PWMs both fire at the Corpse Cart and miss completely.
Combat comes around, and the Undead all have ASF thanks to the Corpse Cart. The Skeletons cause 2 wounds on the Ogres, killing one before it can strike and leaving a solitary Ogre with his packmasters. In return the Ogre, Packmasters and Doomwheel manage to kill 5 Skeletons, leaving another 6 to crumble. The unit holds on though...
Meanwhile, the Warlord's Clanrats suffer 4 wounds from the Ghouls - in return, Greyclaw makes up for his cowardice by slaying 4 Ghouls in return (despite being WS1!). The Ghouls consequently lose the combat by 4, but it isn't enough to destroy them. The final combat doesn't turn out quite as well, with the Ghouls only losing by a single point.
Turn 3 Vampires

The undead closed in as the Banshee and Varghulf both charged the flank of the nearest Clanrat unit. Magic is uneventful, although a crucial Invocation is dispelled to prevent all those slain Undead rising again!
In combat the Ghouls, Varghulf and Banshee kill 10 Clanrats, while the Clanrats cause 3 wounds on the Ghouls. The Steadfast Skaven manage to fail their Ld10 Break test again, and get run down by the Banshee. The unit's PWM turns tail and runs, while the other Clanrats and PWM just manage to hold.
The second Ghouls suffer a single wound from Greyclaw whilst inflicting 2 in return; they lose the combat by 3 but stay in the fight. On the right, the lone Rat Ogre is reduced to a single wound, but between it and the Doomwheel, the remaining Skeletons are slain.
Turn 4 Skaven
The Doomwheel has a clear LoS to the Corpse Cart, and smashes into the side of it. Before combat can begin though, the Cart is blown apart by the Doomwheel's lightning, taking a Ghoul with it. The remaining PWM misfires and explodes.
In the combat, the Clanrats finally defeat the Ghouls and cause them to crumble. They reform to face the oncoming Varghulf.
Turn 4 Vampires

More charges as the Varghulf charges the front of the Clanrats, the Vampire charges the rear and the last Vargheist threads its way through the charge the Doomwheel. The Ghouls and Skeletons reform to face the oncoming Doomwheel.
In a surprise move, the Necromancer casts Raise Dead to raise a unit of Skeletons in the flank of the Clanrats. As if they weren't dead already... Invocation then strengthens said Skeleton unit.
In the combat, the Warlord manages to inflict 4 wounds on the Varghulf, but 2 of them get Regenerated. In return, the Varghulf munches down 4 Clanrats. In the rear, the Vampire begins tearing her way through the rats, slaying 8 of them thanks to Red Fury and her big nasty magic sword. Luckily, the unit hold their courage.
Meanwhile, the Doomwheel ploughs through the Vargheists easily, but suffers a wound in return and goes Out of Control. In a quirk of fate, the loss of control turns the Doomwheel through 90 degrees and moves it straight into touch with the Banshee...
Turn 5 Skaven
No moves, no magic, straight onto shooting (which was rapidly becoming my favourite phase of the game...) The Doomwheel starts by zapping the Banshee and frying her with 5 unsaved wounds. Next closest target is the Master Necromancer, who swiftly follows the Banshee into the Great Beyond with another 5 wounds caused.
The combat proceeded much as it had in the previous round; Greyclaw managed another 2 wounds on the Varghulf, the Varghulf kills another 4 Clanrats in return. The Vampire suffers a poor show of form and only manages to kill 3 Clanrats. Most surprisingly though, the Clanrats manage to inflict 2 unsaved wounds on the Varghulf, thus slaying the giant beastie. It doesn't stop the Clanrats losing the combat though, but they manage to pass a second consecutive Break test and hold!
Turn 5 Vampires
We didn't actually play a fifth turn for the Vampires as time was getting on, and the result was a forgone conclusion anyway. Charges were declared with the Ghouls and the newly-raised Skeletons into the Clanrats, while the other Skeleton unit attempted and failed to charge the Doomwheel.
By this point, the Clanrats were down to a single rank and were faced with two units of 15-strong infantry, and so were no longer Steadfast. The Vampire likely would have finished the Clanrats on her own (although she'd have gotten steamrollered by the Doomwheel in the following turn, if I'd had my way!)
On the face of things, it seemed to be almost another whitewash for Greyclaw and his minions. I had killed a unit each of Ghouls, Skeletons and Vargheists, along with the Varghulf, Corpse Cart, Necromancer and Banshee for a total of 998VPs, plus 25 for a single standard. The end of the Vampire T5 would almost certainly have seen me with just a Doomwheel and a single Rat Ogre left, meaning Paul would have claimed a total of 1132VPs, plus 150 for Greyclaw and two standards. That leaves a difference of 259VPs, which would only be a very Minor Victory (35VPs from a draw...). Having added that up now, it makes me feel slightly better!
Thoughts, Commentary and Analysis
So it turns out I was right, and Greyclaw's second appearance on the field wasn't any worse than the first. In fact, it was much better. I can't really think of any one thing to attribute this to, other than better dice rolling perhaps. The first game probably wasn't a fair test of the army's capabilities, although it definitely highlighted some weaknesses. Those same weaknesses showed up to a (thankfully) lesser extent here as well. The two biggest are namely Leadership, and Killing Power.
Leadership tests are the bane of my existence, and it doesn't just apply to Skaven. I can't do much about my dice rolling (other than ritually sacrifice the Plastic Cubes of Despair). But the biggest way to mitigate my lousy rolling would be to get a Battle Standard Bearer into the list as soon as humanely (skavenly?) possible. I have a model, I can get it painted and I can make space for it in the list - then I'll have two chances to fail Ld10 tests!
The next weakness is killing power; simply put, what I've got to work with at the moment isn't hitty enough, not enough dies (well, not enough enemies die...). The Rat Ogres are capable of dealing out some hefty damage, but they don't stand up to it in return which makes them a bit of a glass cannon. This only reiterates what I said after the first game; T4 and no armour means they cannot sustain any sort of damage for long. Granted, blasting them with my own Doomwheel probably doesn't help but all the same. At least this time they got to cause a good amount of damage in return. It does make the idea of shielding them more appealing, as well as perhaps combining the two units into a single big hitty unit to maintain some semblance of durability (I just hope Clan Moulder has a sale on Rat Ogres soon...)
So it's back to the drawing board, ready to put my (revised) devious plans for world domination into action once again. I have a couple of surprises on the way, courtesy of Clan Ebay, so they might add a bit more punch in the short term. With the first 1500pts of the army done though, it might be time to start thinking long-term and begin planning the expansion to 2000pts and beyond...
The desire to play with a fully painted army overcame the need to make changes to the list, and so I stuck with what I used in the first game:
Warlord Queek Greyclaw ~ 191pts
- Armour of Silvered Steel, Foul Pendant, Poisoned Attacks, Tail Weapon, Additional Hand Weapon
Warlock Engineer Snikch Kraventail ~ 155pts (Warp Lightning, Howling Warpgale)
- Lv.2, Warpmusket, Warlock Optics, Warp-Energy Condenser
Clanrats (40) ~ 285pts
- Full Command, Spears, Shields, Poisoned Wind Mortar
Clanrats (40) ~ 285pts
- Full Command, Spears, Shields, Poisoned Wind Mortar
Rat Ogres (5) ~ 216pts
- 2 Packmasters
Rat Ogres (5) ~ 216pts
- 2 Packmasters
Doomwheel ~ 150pts
Total = 1498pts
Paul's new-fangled list was something like this:
Master Necromancer (Invocation of Nehek, Gaze of Nagash, Wind of Death, Raise Dead)
- Lv.4, Master of the Dead
Vampire (Invocation of Nehek, Hellish Vigour)
- Red Fury, Sword of Strife, Lv.2
Tomb Banshee
15 Ghouls
15 Ghouls
18 Skeletons
- Full Command
18 Skeletons
- Full Command
Corpse Cart
3 Vargheists
- Vargoyle
Varghulf
Pre-game and Deployment
I rolled Warp-Lightning and Howling Warpgale straight off, which was fortunate - Howling Warpgale might help to mitigate those nasty Vargheists flying across the table, and Warp-Lightning is a Warlock Engineer's spell of choice.
Paul started off by rolling Vanhel's and Hellish Vigour, and chose to swap Vanhel's for Invocation. The Necromancer picked up Invocation, Wind of Death, Gaze of Nagash and Raise Dead.

I lost the roll-off for deployment and was made to place first. The two Clanrat units took the centre, flanked by their respective Mortars who were flanked in turn by the two units of Rat Ogres. The Doomwheel went out on the right flank.
Paul proceeded to avoid the Doomwheel and load his own right flank with the Varghulf, Banshee and Vargheists. The infantry took up position opposite my own troops, a symmetrical deployment with a unit of Ghouls and Skeletons on either side of the Corpse Cart. The Necromancer hid behind one unit of Ghouls while the Vampire hid behind the other.
I won the roll-off for first turn, and took it.
Turn 1 Skaven
A very brief movement phase opened the game, with the Doomwheel advancing down the right flank and the Clanrats edging forward so that the Warlock Engineer was within range for some Warp-Lightning action.
Magic came and rolled 5PD, with 3DD. I forgot the Warp-Energy Condenser again, and failed to channel, but Howling Warpgale went through along with Warp-Lightning on the left-hand Ghouls killing 5 of them.
The Doomwheel driver failed his Ld test not to shoot, and the Wheel ending up zapping the nearest Rat Ogres, causing 10 wounds! Ouch!! Meanwhile, the right-hand PWM lands a globe right on top of the right-hand Ghouls and kills 5 of them, and the left-hand PWM aims for the left-hand Ghouls but ends up catching the back of the Skeletons, killing 2.
Turn 1 Vampires

The Undead begin their march forward; the nasties on the left flank advance ahead of the infantry (although the Vargheists are thankfully stymied by Howling Warpgale). The Skeletons on the far right wheel to face the Doomwheel while the rest of the infantry move straight fowards.
Magic generates 7PD, with 5DD. Invocation from the Vampire raised the right-hand Ghouls back up to full strength. Gaze of Nagash casts, but I chose to let it go through for the loss of two Clanrats. The final attempt at Invocation is thoroughly dispelled.
Turn 2 Skaven
Both units of Rat Ogres are forced to charge at the Varghulf and right-hand Skeletons respectively, but a poor set of rolls sees both charges fail and the Rat Ogres shuffle forwards. The Doomwheel suffers a similar bout of bad rolling, and trundles forwards a paltry 6". The Clanrats advance to maintain the line.
Magic comes around and I get a massive 12PD to work with. Quite perplexed as to what to do with this new-found power, the Warlock Engineer proceeds to roll three 6s on four dice when casting Warpgale and causes a Calamitous Detonation, killing 3 Clanrats and wounding himself.
Meanwhile, in the Shooting phase, the Doomwheel zaps 3 Skeletons from the right-hand unit, one of the PWMs kills 3 Skeletons from the other unit and the final PWM shot misses everything by a country mile.
Turn 2 Vampires

The first successful charges of the game as the Vargheists and Varghulf charge the left-hand Rat Ogres. Everything else advances, and the slight bottleneck means we're relatively evenly matched in the centre.
Another poor roll for magic sees the Undead given a paltry 4PD to work with. Despite all that, Invocation manages to cast big and pretty much raises everything I'd killed thus far. The only Vampire shooting of the game sees the Banshee attempt to scream the PWM to death, only to fail dismally.
Combat gets pretty brutal as the Varghulf and Vargheists inflict a total of 11 wounds on the Rat Ogres. The Ogres inflict 7 wounds back against the Vargheists, but only manage 1 against the Regenerating Varghulf. The resulting break test sees the Ogres flee off the table. While the last Vargheist pursues, the 'gulf reforms to face the flank of the nearby Clanrats. Uh oh...
Turn 3 Skaven
A series of charges from the rats; both Clanrat units charge the Ghouls in front of them, while the remaining Rat Ogre unit charges the right-hand Skeletons. The Doomwheel then ploughs into the flank of the same Skeletons. Somewhat unsurprisingly, Greyclaw's unit of Clanrats manage to fail their Fear test...
No magic as the Engineer was engaged in combat, and so straight onto shooting. The Doomwheel zaps another 3 Skeletons, while the PWMs both fire at the Corpse Cart and miss completely.
Combat comes around, and the Undead all have ASF thanks to the Corpse Cart. The Skeletons cause 2 wounds on the Ogres, killing one before it can strike and leaving a solitary Ogre with his packmasters. In return the Ogre, Packmasters and Doomwheel manage to kill 5 Skeletons, leaving another 6 to crumble. The unit holds on though...
Meanwhile, the Warlord's Clanrats suffer 4 wounds from the Ghouls - in return, Greyclaw makes up for his cowardice by slaying 4 Ghouls in return (despite being WS1!). The Ghouls consequently lose the combat by 4, but it isn't enough to destroy them. The final combat doesn't turn out quite as well, with the Ghouls only losing by a single point.
Turn 3 Vampires

The undead closed in as the Banshee and Varghulf both charged the flank of the nearest Clanrat unit. Magic is uneventful, although a crucial Invocation is dispelled to prevent all those slain Undead rising again!
In combat the Ghouls, Varghulf and Banshee kill 10 Clanrats, while the Clanrats cause 3 wounds on the Ghouls. The Steadfast Skaven manage to fail their Ld10 Break test again, and get run down by the Banshee. The unit's PWM turns tail and runs, while the other Clanrats and PWM just manage to hold.
The second Ghouls suffer a single wound from Greyclaw whilst inflicting 2 in return; they lose the combat by 3 but stay in the fight. On the right, the lone Rat Ogre is reduced to a single wound, but between it and the Doomwheel, the remaining Skeletons are slain.
Turn 4 Skaven
The Doomwheel has a clear LoS to the Corpse Cart, and smashes into the side of it. Before combat can begin though, the Cart is blown apart by the Doomwheel's lightning, taking a Ghoul with it. The remaining PWM misfires and explodes.
In the combat, the Clanrats finally defeat the Ghouls and cause them to crumble. They reform to face the oncoming Varghulf.
Turn 4 Vampires

More charges as the Varghulf charges the front of the Clanrats, the Vampire charges the rear and the last Vargheist threads its way through the charge the Doomwheel. The Ghouls and Skeletons reform to face the oncoming Doomwheel.
In a surprise move, the Necromancer casts Raise Dead to raise a unit of Skeletons in the flank of the Clanrats. As if they weren't dead already... Invocation then strengthens said Skeleton unit.
In the combat, the Warlord manages to inflict 4 wounds on the Varghulf, but 2 of them get Regenerated. In return, the Varghulf munches down 4 Clanrats. In the rear, the Vampire begins tearing her way through the rats, slaying 8 of them thanks to Red Fury and her big nasty magic sword. Luckily, the unit hold their courage.
Meanwhile, the Doomwheel ploughs through the Vargheists easily, but suffers a wound in return and goes Out of Control. In a quirk of fate, the loss of control turns the Doomwheel through 90 degrees and moves it straight into touch with the Banshee...
Turn 5 Skaven
No moves, no magic, straight onto shooting (which was rapidly becoming my favourite phase of the game...) The Doomwheel starts by zapping the Banshee and frying her with 5 unsaved wounds. Next closest target is the Master Necromancer, who swiftly follows the Banshee into the Great Beyond with another 5 wounds caused.
The combat proceeded much as it had in the previous round; Greyclaw managed another 2 wounds on the Varghulf, the Varghulf kills another 4 Clanrats in return. The Vampire suffers a poor show of form and only manages to kill 3 Clanrats. Most surprisingly though, the Clanrats manage to inflict 2 unsaved wounds on the Varghulf, thus slaying the giant beastie. It doesn't stop the Clanrats losing the combat though, but they manage to pass a second consecutive Break test and hold!
Turn 5 Vampires
We didn't actually play a fifth turn for the Vampires as time was getting on, and the result was a forgone conclusion anyway. Charges were declared with the Ghouls and the newly-raised Skeletons into the Clanrats, while the other Skeleton unit attempted and failed to charge the Doomwheel.
By this point, the Clanrats were down to a single rank and were faced with two units of 15-strong infantry, and so were no longer Steadfast. The Vampire likely would have finished the Clanrats on her own (although she'd have gotten steamrollered by the Doomwheel in the following turn, if I'd had my way!)
On the face of things, it seemed to be almost another whitewash for Greyclaw and his minions. I had killed a unit each of Ghouls, Skeletons and Vargheists, along with the Varghulf, Corpse Cart, Necromancer and Banshee for a total of 998VPs, plus 25 for a single standard. The end of the Vampire T5 would almost certainly have seen me with just a Doomwheel and a single Rat Ogre left, meaning Paul would have claimed a total of 1132VPs, plus 150 for Greyclaw and two standards. That leaves a difference of 259VPs, which would only be a very Minor Victory (35VPs from a draw...). Having added that up now, it makes me feel slightly better!
Thoughts, Commentary and Analysis
So it turns out I was right, and Greyclaw's second appearance on the field wasn't any worse than the first. In fact, it was much better. I can't really think of any one thing to attribute this to, other than better dice rolling perhaps. The first game probably wasn't a fair test of the army's capabilities, although it definitely highlighted some weaknesses. Those same weaknesses showed up to a (thankfully) lesser extent here as well. The two biggest are namely Leadership, and Killing Power.
Leadership tests are the bane of my existence, and it doesn't just apply to Skaven. I can't do much about my dice rolling (other than ritually sacrifice the Plastic Cubes of Despair). But the biggest way to mitigate my lousy rolling would be to get a Battle Standard Bearer into the list as soon as humanely (skavenly?) possible. I have a model, I can get it painted and I can make space for it in the list - then I'll have two chances to fail Ld10 tests!
The next weakness is killing power; simply put, what I've got to work with at the moment isn't hitty enough, not enough dies (well, not enough enemies die...). The Rat Ogres are capable of dealing out some hefty damage, but they don't stand up to it in return which makes them a bit of a glass cannon. This only reiterates what I said after the first game; T4 and no armour means they cannot sustain any sort of damage for long. Granted, blasting them with my own Doomwheel probably doesn't help but all the same. At least this time they got to cause a good amount of damage in return. It does make the idea of shielding them more appealing, as well as perhaps combining the two units into a single big hitty unit to maintain some semblance of durability (I just hope Clan Moulder has a sale on Rat Ogres soon...)
So it's back to the drawing board, ready to put my (revised) devious plans for world domination into action once again. I have a couple of surprises on the way, courtesy of Clan Ebay, so they might add a bit more punch in the short term. With the first 1500pts of the army done though, it might be time to start thinking long-term and begin planning the expansion to 2000pts and beyond...
To War!
Well, after quite a long wait, I finally finished painting the two Poisoned Wind Mortars and my Warlord (Queek Greyclaw) at the end of last week. Sadly, Queek's generalship doesn't seem to have improved much with his new paint job, but more on that later. For now, pictures!


Pretty happy with how the Warlord turned out in the end, although the Skaven runes on the back banners could have been better (really need a much better brush, and steadier hands...)


 Very happy with these two, although I probably should have differentiated between them more. I like how the Globes turned out; I wasn't sure it would work, but the gloss varnish helps bring the various swirling colours together nicely I think.
So those few figures take me up to 54 completed painted figures for the year to date. For me, that's pretty impressive! It also means that I now have a completely painted 1500pts Skaven army, with which I played a second game of Warhammer in as many weeks on Monday! More on that to follow...


Pretty happy with how the Warlord turned out in the end, although the Skaven runes on the back banners could have been better (really need a much better brush, and steadier hands...)


So those few figures take me up to 54 completed painted figures for the year to date. For me, that's pretty impressive! It also means that I now have a completely painted 1500pts Skaven army, with which I played a second game of Warhammer in as many weeks on Monday! More on that to follow...
Monday, 13 February 2012
Return to Middle-Earth?
The Lord of the Rings Strategy Battle Game doesn't seem to get talked about much these days. Even Games Workshop seems to relegate it to the odd White Dwarf article now and again as Fantasy and especially 40K take the limelight. Until February's edition, that is. It seems like all this radio silence from GW on the subject of LotR is simply the calm before the storm that is the release of a "new edition" of LotR.
It's not really a new edition of course. If anything, it's a re-release of the old stuff in a new format, namely five new sourcebooks (all of which were previously found in one volume, the Legions of Middle Earth book...), a couple of new models and then mostly old stuff recast in Finecast and bumped up in price.
But I won't go off on a rant about GW pricing; it's their right as a business to make as much money as they can, there are obviously people who are happy to pay the price, and if I don't want to then I simply don't buy the models. I'd be interested to see exactly how much has changed in the sourcebooks though; as I mentioned above, all five of these sourcebooks were previously available in the Legions of Middle-Earth book (which I own) so unless these new sourcebooks offer drastic changes I'll stick to Legions and get access to all of the information from all five books (and save myself £75...)
Anyway, back to the game itself. Well, it's a game I've enjoyed for a long time - I got the Fellowship of the Ring boxed game when it came out (waaaaay back in December 2001) and remember getting the actual Fellowship that Christmas as well. I got the Two Towers box the year after, and that built the foundation for the LotR armies I have now. I didn't get the Return of the King box for some reason, but that was fine by me because I had the figures I wanted - Rohan, Moria and Isengard were all more interesting to me than Gondor and Mordor.
I've probably played more games of LotR than anything else over the years. It's a great game, very different to either Fantasy or 40K in terms of mechanics and until The War of the Ring 'expansion' was introduced, it was focussed on a much smaller scale than either of it's sibling Core systems, which made both gaming and collecting much easier than either Fantasy or 40K as well. Of course, that still doesn't mean I managed to paint all my LotR figures - I still have figures from those original boxed games still to paint. That hasn't stopped my enjoyment of the game over the years though.
And now, with the apparent resurgence of the LotR, my interest has been piqued again and I'm itching to get painting and playing LotR again. I've brought the old figures out of their boxes and drawers, and begun working on a few here and there. It's occurred to me that I've never actually posted pictures of any of my previous painted figures on here; I've only ever shown WiPs and stuff that I've been painting while the blog has been active. Well, now I have an excuse to show some of my old LotR stuff. In the meantime, I got a bunch of Moria Goblins out and began to paint them.

It's not really a new edition of course. If anything, it's a re-release of the old stuff in a new format, namely five new sourcebooks (all of which were previously found in one volume, the Legions of Middle Earth book...), a couple of new models and then mostly old stuff recast in Finecast and bumped up in price.
But I won't go off on a rant about GW pricing; it's their right as a business to make as much money as they can, there are obviously people who are happy to pay the price, and if I don't want to then I simply don't buy the models. I'd be interested to see exactly how much has changed in the sourcebooks though; as I mentioned above, all five of these sourcebooks were previously available in the Legions of Middle-Earth book (which I own) so unless these new sourcebooks offer drastic changes I'll stick to Legions and get access to all of the information from all five books (and save myself £75...)
Anyway, back to the game itself. Well, it's a game I've enjoyed for a long time - I got the Fellowship of the Ring boxed game when it came out (waaaaay back in December 2001) and remember getting the actual Fellowship that Christmas as well. I got the Two Towers box the year after, and that built the foundation for the LotR armies I have now. I didn't get the Return of the King box for some reason, but that was fine by me because I had the figures I wanted - Rohan, Moria and Isengard were all more interesting to me than Gondor and Mordor.
I've probably played more games of LotR than anything else over the years. It's a great game, very different to either Fantasy or 40K in terms of mechanics and until The War of the Ring 'expansion' was introduced, it was focussed on a much smaller scale than either of it's sibling Core systems, which made both gaming and collecting much easier than either Fantasy or 40K as well. Of course, that still doesn't mean I managed to paint all my LotR figures - I still have figures from those original boxed games still to paint. That hasn't stopped my enjoyment of the game over the years though.
And now, with the apparent resurgence of the LotR, my interest has been piqued again and I'm itching to get painting and playing LotR again. I've brought the old figures out of their boxes and drawers, and begun working on a few here and there. It's occurred to me that I've never actually posted pictures of any of my previous painted figures on here; I've only ever shown WiPs and stuff that I've been painting while the blog has been active. Well, now I have an excuse to show some of my old LotR stuff. In the meantime, I got a bunch of Moria Goblins out and began to paint them.

This is post-undercoat and Chainmail drybrush. Goblins are so easy to paint, I don't know why I couldn't finish them years ago. Still, these will make a nice break from Clanrats and will fill the time until I can get outside to undercoat the next batch of rats. In the meantime, expect a few more LotR posts. I might even try and convince Gary and Paul to finally play a game...
Subscribe to:
Posts (Atom)